
- Home
- Maintenance & Track Care
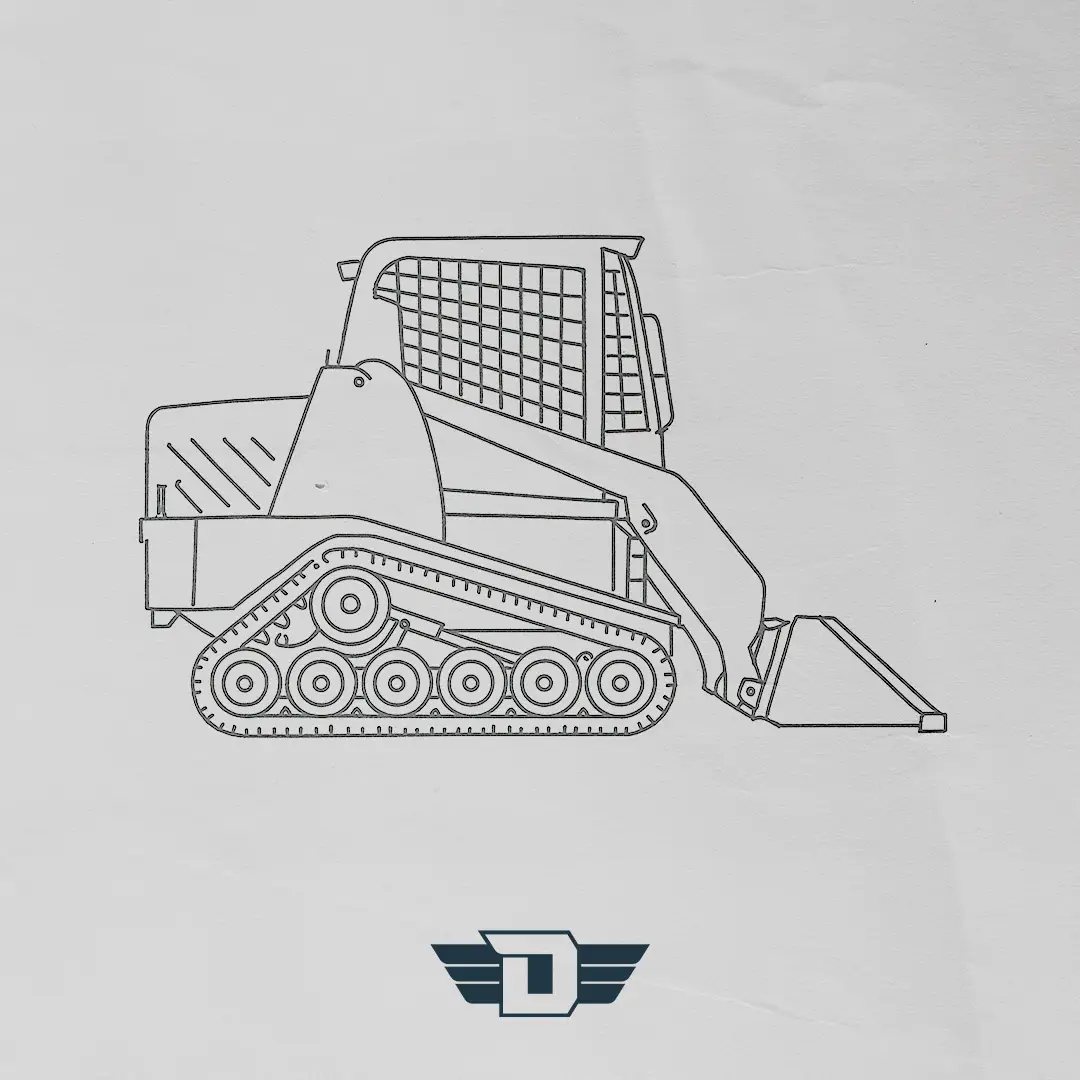
- When to Replace Rubber Tracks > Field-Tested Signs for Longer Life
When to Replace Rubber Tracks > Field-Tested Signs for Longer Life

TL;DR: When to Replace Rubber Tracks
Know when to replace rubber tracks: cords showing, can’t hold tension, de-tracking, new vibration/noise.
Replace on time to protect undercarriage and keep cost-per-hour predictable.
Plan lifespan: most see ~1,200–1,600 hours; terrain, operators, maintenance, and storage change it.
Set sag to spec; recheck often. Over-tight kills seals; too loose de-tracks and scuffs guides.
Before blaming tracks, inspect sprockets, rollers, idlers; replace worn parts and usually both tracks on CTLs.
I’ve learned one hard truth the expensive way: the cheapest day to deal with worn tracks is today—before they fail.
Downtime hurts. If a track fails mid-pour or mid-harvest, everyone waits. In this guide I’ll show you when to replace rubber tracks, how long they really last, and the habits that stretch their life without risking safety or your undercarriage.
When to replace rubber tracks (quick answer)

If you can see cords or core bars, it’s time.
If the track won’t hold tension, keeps de-tracking, or the machine rides rough with new noise or vibration, replacement beats repair.
Immediate red flags you shouldn’t ignore
- Steel cords showing anywhere on the carcass
- Broken or loose core bars
- Missing/torn lugs or flattened tread that causes slipping or de-tracking
- Chronic loss of tension even after adjustment
- Slipping over sprockets or frequent de-tracking
- New vibration, grinding, or pulling to one side
Why timely replacement protects your undercarriage and uptime
Running a dead track chews sprockets, idlers, and rollers. It beats up guide rails and seals. Replacing on time protects the undercarriage, prevents cascading failures, and keeps cost-per-hour predictable.
What counts as “end of life”? (How to tell at a glance)

Visual indicators vs. operational symptoms
Visual signs
- Cracks and cuts that reach the cords
- Exposed cords/core bars
- Missing or torn lugs; tread flattened well below pattern
- Sidewall or guide-rail (inner guide) damage
- Dry rot from heat, UV, or chemicals
Operational signs
- Won’t hold spec tension after adjustment
- Slips over the sprocket or de-tracks
- Pulls to one side or vibrates more than usual
- New clunks/grinding from the undercarriage
Safety risks and cost-per-hour trade-offs
Old tracks fail at the worst times—on slopes, around people, under a load. Temporary fixes raise risk and cost.
Your rubber track lifespan math flips fast when a borderline track burns a day of production or damages parts.
Full checklist: signs it’s time to replace rubber tracks

Every time a customer tried to “run one more week,” they paid more later—in rollers, sprockets, guards, and lost hours.
So here’s a quick checklist:
| What to look for | Notes | |
|---|---|---|
| Cracks, cuts, and chunking reaching the cords | Surface cracking is normal with age. Cords showing is a stop sign. | |
| Exposed steel cords or broken core bars | Once structure is open to moisture and dirt, failure speeds up. | |
| Missing/torn lugs or flattened tread | Low tread = low traction. Missing lugs invite de-tracking and sprocket damage. | |
| Chronic loss of tension (won’t hold spec) | If you’re topping off the adjuster and sag returns, the carcass is stretched past service life. | |
| Slipping over sprockets or frequent de-tracking | The pitch/engagement is off. The track is done, the sprocket is worn, or both. | |
| Abnormal noise, vibration, or steering pull | Uneven tread height or a worn guide rail steers the machine and accelerates wear elsewhere. | |
| Guide rail or sidewall damage | Once the guide profile is compromised, mis-tracking becomes routine. | |
| Dry rot, UV, chemical, or heat damage | Sun, oil, solvents, hot asphalt, and high heat harden rubber and shorten rubber track lifespan. |
How long do rubber tracks last?

Short answer: plan for 1,200–1,600 hours under mixed use, with plenty of swing based on ground, habits, and build quality.
Some sets die earlier; well-spec’d, well-maintained tracks can push past the high end.
Why tracks actually wear out (the simple science)
Rubber doesn’t just “rub away.” Tiny cracks form, then grow with heat, friction, and sharp impacts.
Stress isn’t even, either—the edges and corners of the tread see the highest load, especially during tight turns or on hard, abrasive surfaces. That’s why one side of the pattern often goes first.
Inside the track, the rubber compound and steel-cord construction matter. Better compounds resist heat and cracking; continuous, well-anchored cords keep tension stable and slow stretch.
Real-world ranges by machine type (general guidance)
- Compact track loaders & skid steers: tighter turns and hard surfaces = faster wear.
- Mini excavators: fewer high-speed turns, often slightly longer life.
- Ag & land work: depends on soil, crop stubble, and road travel time.
What shortens life (and what extends it)
Speeds wear up:
- Counter-rotation and sharp, fast turns on concrete or asphalt
- Rocky/demo terrain, rebar, and curb strikes
- Packed mud, gravel, or ice in the undercarriage (uneven load = hot spots)
- Sun/heat and chemical exposure that dry out rubber
Slows wear down:
- Three-point turns; throttle discipline on hard ground
- Correct tension checked often (too loose = slip/tearing; too tight = cord strain)
- Daily/seasonal cleanouts so rollers and guides run true
- Shade and cool storage; keep oils/solvents off rubber
- Mixing surface types during long pavement runs to reduce heat buildup
Quality matters: OEM-quality vs. aftermarket (general, brand-neutral)
You’ll see longer life from tracks built with:
- Virgin rubber compounds for consistent wear resistance
- Continuous steel cords for strength and stable tension
- Tight manufacturing controls (e.g., ISO-style quality systems)
Typical averages (not guarantees):
- OEM-quality or premium aftermarket: ~1,200–1,600 hours with good care
- Value/budget aftermarket: ~600–1,200 hours (top-tier options can match OEM-quality when built to the specs above)
Quick cost-per-hour check
Price of the set ÷ expected hours = cost per hour.
If nursing a tired track risks even a half-day of downtime, the math usually says replace.
Example: $2,400 ÷ 1,400 hrs ≈ $1.71/hr. Nursing a track that risks a day of downtime? The math makes the decision.
When to replace your tracks (tie-in to lifespan)
- Cracks reaching cords or exposed cords/core bars
- Chunking/lost lugs, slipping, or frequent de-tracking
- Won’t hold tension (adjuster near max, sag returns)
- New vibration, poor ride, or traction loss
Bottom line:
There’s no fixed “expiration date” for rubber tracks. Lifespan comes down to where you run, how you run, how you maintain, and what you bought.
Get those four right, and you’ll consistently hit—or beat—the high end of the range.
OEM vs. Aftermarket: Which Rubber Tracks Last Longer?
We dug into multiple reputable industry sources to get a clear picture of how long rubber tracks actually last under varied conditions.
Here’s what we found:
- Typical rubber track lifespan varies widely—from about 400 to 2,000 hours of use, depending on factors like terrain, operator behavior, and maintenance. 1, 2, 3, 4, 5, 6, 7, 8, 9, 10
OEM Track Performance
- Many sources report OEM tracks usually last between 1,200 and 1,600 hours in standard working conditions.
- Some users have even seen OEM tracks reach 4,000 hours of life, far exceeding average expectations.
Aftermarket Track Performance
- A seasoned fleet technician shared that factory Bridgestone tracks lasted about 1,200 hours, while aftermarket replacements lasted around 600 hours.
- Other sources echo this trend: aftermarket tracks often have noticeably shorter lifespans, though some high-quality versions, like Dyne Industries have the same OEM durability in ideal conditions.
| Category | Typical Lifespan | Notes |
|---|---|---|
| OEM Tracks | ~1,200–1,600 hours | Reliable baseline in normal usage |
| OEM Tracks (some cases) | Up to ~4,000 hours | Exceptional longevity under good care |
| Aftermarket Tracks | ~600 hours | Often significantly lower than OEM |
| Aftermarket (premium/high-end) | 1,000+ hours | With Dyne Industries or under optimal conditions & quality |
| Tracks under abusive use | <500 hours | Can fail prematurely due to misuse |
Rubber tracks carry the whole machine. They grip, turn, climb, and push—so they take the most abuse.
When you understand why they wear, you’ll spot the moment when to replace rubber tracks before they cost you a day of production.
The science (or the way we see it on jobs)
Tracks don’t just “rub away.” Tiny cracks start in the rubber and grow. Heat, friction, and sharp hits speed that up. Inside the track, the rubber compound and steel-cord layout decide how well it resists cracking and stretch.
Wear is never even. Edges and corners take the worst of tight turns and hard, abrasive ground. That’s why one side of the tread goes first.
Our machines that split time between dirt and softer ground last longer than units stuck on concrete, rock, or demo sites.
Takeaway: Where and how you run matters as much as what you bought. We see it every week.
Habits that extend life (what we teach every renter on day one)
Skip constant counter-rotation on hard surfaces—it builds heat and crack growth.
Check tension often. Too loose = slip/tearing lugs. Too tight = cord strain. Use your model’s sag spec.
Keep it clean. Mud, gravel, and ice change how the track sits on rollers and create hot spots.
Mix surfaces when you can. Break up long pavement runs to shed heat.
Store smart. Shade and cool temps help; keep oils/solvents off rubber.
A quick story:
A paving crew I knew started rinsing undercarriages at lunch and end-of-day during spring thaw. De-tracking dropped, seals ran cooler, and they squeezed another couple hundred hours out of that set. Small habit, big return.
Choosing well (how we spec tracks for our fleet)
Lifespan starts with build quality. We look for:
Virgin rubber compounds for consistent wear resistance
Continuous steel cords for strength and stable tension
Tight manufacturing controls (ISO-style quality systems)
With decent ground and good habits, we commonly see ~1,200–1,600 hours from OEM-quality or premium aftermarket tracks. Budget lines run lower. Your hours will swing with terrain, operators, and maintenance.
Bottom line from the yard
There’s no calendar date for replacement. The right time to replace rubber tracks is when structure or safety is in question—cords showing, tension won’t hold, de-tracking, loud new vibration, or damaged guides. Spot it early, plan the swap, and you’ll protect your undercarriage, your schedule, and your budget.

Let's keep you on track
Track tension basics (a key driver of replacement timing)

How tight should rubber tracks be? (follow your manual)
Every model lists a sag spec and process. Follow it. Over-tight kills rollers and seals; too loose de-tracks and scuffs guide rails. Use the track tension guide in your manual.
Quick sag check: daily/weekly routine
- Park level; raise the track safely.
- Measure sag at the midpoint of the lower run.
- Compare to spec; adjust via grease tensioner as directed.
Signs the adjuster is at its limit (time to replace)
If the idler is near max and sag still grows, the carcass is stretched. That’s end-of-life.
Common tension mistakes that kill tracks
- Cranking tension after a muddy day without cleaning
- Running “extra tight to be safe”
- Ignoring leaks at the adjuster
Skipping re-checks after a new install
Don’t blame the track until you check the undercarriage

Sprockets: hooked teeth, skipping, uneven wear
Hooked or sharp teeth will eat new tracks. If sprockets are shot, replace them with the tracks to protect your investment. (Dyne supplies tracks; source sprockets via your service provider.)
Rollers and idlers: flat spots, leaks, binding
Leaking seals or seized rollers create hot spots and mis-tracking.
Debris and mud: why cleaning prevents internal damage
Packed mud acts like sandpaper. Clean daily in wet seasons to protect the carcass and extend undercarriage maintenance intervals.
Let's keep you on track
Replace both rubber tracks—or just one?

When replacing both is the smart move (even traction, balanced wear)
On CTLs and other compact track loader tracks, matched pairs keep straight tracking, even traction, and predictable steering.
When a single-track swap is okay (temporary exceptions and cautions)
On mini excavator track replacement, a one-side swap can get you through a short window if the mate still has life. Expect uneven traction; monitor tension and steering closely.
Special notes for suspended undercarriages (ASV-style systems)
Suspended systems are sensitive to mismatch. Replacing both tracks is best practice to protect bogies and belts.
Repair vs. replace: what’s actually safe?

Cosmetic fixes vs. structural failures (cords/core = replace)
Small surface gouges can be trimmed and watched. Exposed cords, broken core bars, or separated lugs = replace. Patches won’t restore structure.
Downtime, safety, and liability considerations
A “cheap” repair that fails on a slope or around people is never cheap. If you’re asking when to replace rubber tracks and safety is in play, you already have your answer.
Pro tips to extend life between replacements

Operator habits: gentler turns, speed control, avoid sharp edges
- Three-point turns beat counter-rotation
- Slow down on concrete and asphalt
- Avoid rebar, demolition scrap, and sharp curbs when you can
Maintenance routine: clean, inspect, and set correct tension
- Daily walk-around: lugs, sidewalls, guide rails, leaks
- Follow the track tension guide for sag checks
- Log issues so small problems don’t become big ones
Storage and environment: shade, chemicals, temperature
Park off hot asphalt. Keep oil and solvents off rubber. Shade reduces UV damage and protects rubber track lifespan.
Cleaning methods and products: mild detergents, rinse thoroughly
Knock off mud first. Use a mild cleaner. Rinse the undercarriage. Don’t blast seals up close.
Step-by-step plan for replacing rubber tracks

Prep checklist: tools, safety, lifting, supports
✅ Level ground, chocks, jack/stands rated for the machine
✅ PPE: gloves, eye protection, steel toes
✅ Bar, grease gun, torque tools, pressure gauge
✅ Service manual for your model
Removal and installation overview (model-specific torque/tension)
- Relieve tension per manual (usually bleed the grease adjuster).
- Walk the track off with machine power and a bar—slow and controlled.
- Inspect the undercarriage: sprockets, rollers, idlers, guides.
- Fit the new track over sprocket and idler; align guides.
- Re-pressurize adjuster to spec sag using the track tension guide.
- Torque fasteners to spec; check guards.
For skid steers and compact track loader tracks, avoid prying on seals.
For mini excavator track replacement, use the boom to lift safely—never rely on a single jack.
Break-in steps and first-week rechecks
- Re-check sag after the first hour, then daily for a week
- Watch for settling, noises, or steering pull
- Clean after muddy or dusty shifts so grit doesn’t grind in
Conclusion: The smart time to replace rubber tracks
Quick recap of must-replace triggers
✅ Cords or core bars showing
✅ Won’t hold tension / adjuster maxed
✅ Slipping, de-tracking, or loud new vibration
✅ Missing lugs, flattened tread, or guide-rail damage
Next steps: inspect, document, measure, order, schedule downtime
✅ Inspect today; document wear with photos
✅ Measure width × pitch × links and confirm guide type
✅ Order from Dyne Industries Inc.—right fit, shipped fast across Canada
✅ Schedule the swap during a low-impact window and log a first-week recheck
Let's keep you on track
FAQs: When to replace rubber tracks
Daily. A 60-second walk-around catches cuts, missing lugs, leaks, and tension issues.
Plan around 1,200–1,600 hours, depending on surface, habits, and care.
Best practice on CTLs is both together. On a mini excavator, a single track can work short-term if the mate still has life—monitor traction and steering.
Small cosmetic cuts can be trimmed. If cords or core bars are exposed, replace. Patches won’t restore structure or safety.
Stretched carcass, a leaking adjuster, or packed debris. If the adjuster is near max and sag returns, it’s time to replace.
Yes. Hooked teeth will eat new tracks quickly. Inspect and replace with the tracks when they’re past spec.
Match ground to pattern: block for mixed surfaces, bar/ag for soft soils, non-marking for finished floors.
Follow your model’s track tension guide. Over-tight kills seals; too loose de-tracks. Re-check after installs and muddy shifts.
Knock off heavy mud, use mild detergent, rinse the undercarriage, and let it dry. Avoid blasting seals at close range.
- compact track loader tracks
- construction equipment maintenance
- cost per hour
- CTL maintenance
- de-tracking
- downtime prevention
- exposed cords
- guide rail damage
- mini excavator track replacement
- rubber track cleaning
- rubber track installation
- rubber track lifespan
- rubber track replacement
- signs of worn rubber tracks
- skid steer maintenance
- skid steer tracks
- sprocket wear
- tension adjuster
- track storage
- track tension guide
- undercarriage maintenance
- when to replace rubber tracks

Learn how to put rubber tracks on a skid steer with this step-by-step guide. Includes tools, safety tips, tension advice, and FAQs