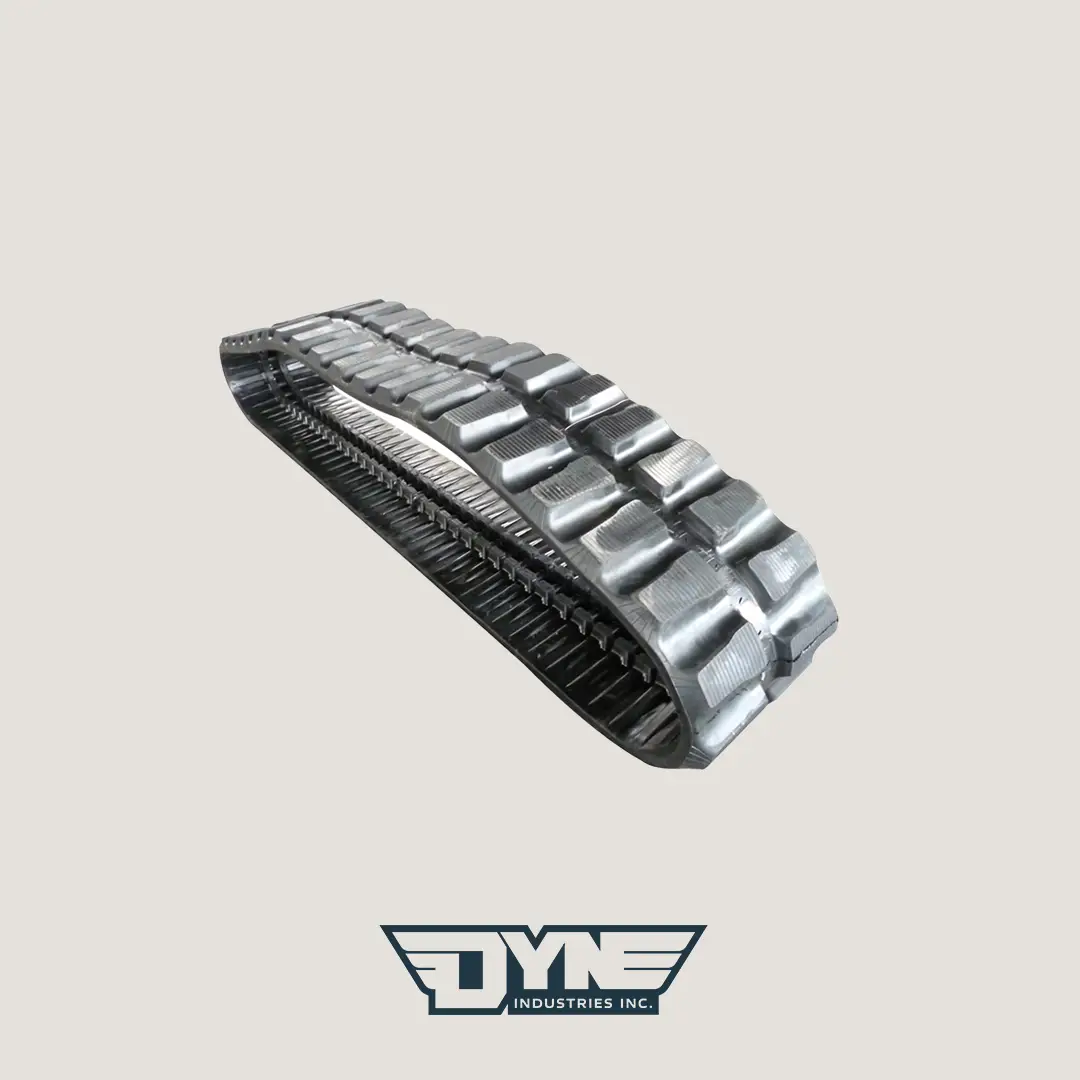



Knowing when to replace skid steer tracks can save you from a machine sitting dead on the jobsite while the crew waits.
A worn track does not always fail slowly. Sometimes it starts with slipping, ratcheting, poor tension, or exposed cords. Then it turns into a thrown track, damaged sprocket, or rush order when the machine should already be working.
There is no reliable “replace at this exact hour” rule for every skid steer track. Track life depends on the machine, operator habits, soil, rock, pavement, slopes, cleaning, tension, and maintenance.
This guide will help you understand:
- The main signs of worn skid steer tracks
- When track damage is serious
- How to inspect rubber tracks before replacement
- Why tension, sprockets, rollers, and idlers matter
- What to check before ordering replacement rubber tracks
The goal is simple: help you make a better decision before downtime gets expensive.
TL;DR
- There is no set hour rule for When to Replace Skid Steer Tracks. Inspect by condition, wear, and tension.
- Replace tracks if you see exposed cords, severe cracking, missing lugs, or major chunking.
- A track that will not hold tension or keeps de-tracking should be inspected right away.
- Check sprockets, rollers, idlers, and track alignment before installing new rubber tracks.
- Order replacement tracks before peak season to avoid costly downtime on the jobsite.
There Is No Universal Hour Rule for Replacing Skid Steer Tracks
Many operators want a simple answer. They want to know if tracks should be replaced at 800 hours, 1,200 hours, or 1,500 hours.
The problem is that track hours only tell part of the story.
Two machines can have the same hours and very different track condition. A compact track loader working in soft soil or snow will wear tracks differently than a machine running over rock, demolition debris, frozen ruts, gravel, or asphalt.
Operator habits matter too. Sharp turns, spinning, side-slope work, and long travel on hard surfaces can all shorten track life.
That is why most replacement decisions should be condition-based.
Instead of relying only on hours, look at:
- Track tread depth
- Track tension
- Exposed cords or cables
- Missing lugs
- Cracks and chunking
- Ratcheting over the sprocket
- Repeated de-tracking
- Sprocket, roller, and idler wear
In other words, use hours as a planning tool, not as the final decision.
For example, a machine with 600 hard hours in rock or demolition work may need tracks sooner than a machine with 1,200 cleaner hours in soil or snow.
If you manage one machine, inspect it often. If you manage a fleet, build a replacement plan around wear checks, not just the hour meter.
That approach helps you avoid two costly mistakes: replacing tracks too early or waiting until one fails in the middle of a job.
What “Skid Steer Tracks” Usually Means
Before we go deeper, it helps to clear up the wording.
Many people say “skid steer tracks” when they are talking about rubber tracks on compact track loaders. Others may mean over-the-tire tracks that fit around skid steer tires.
Both systems are used on jobsites, but they are not the same.
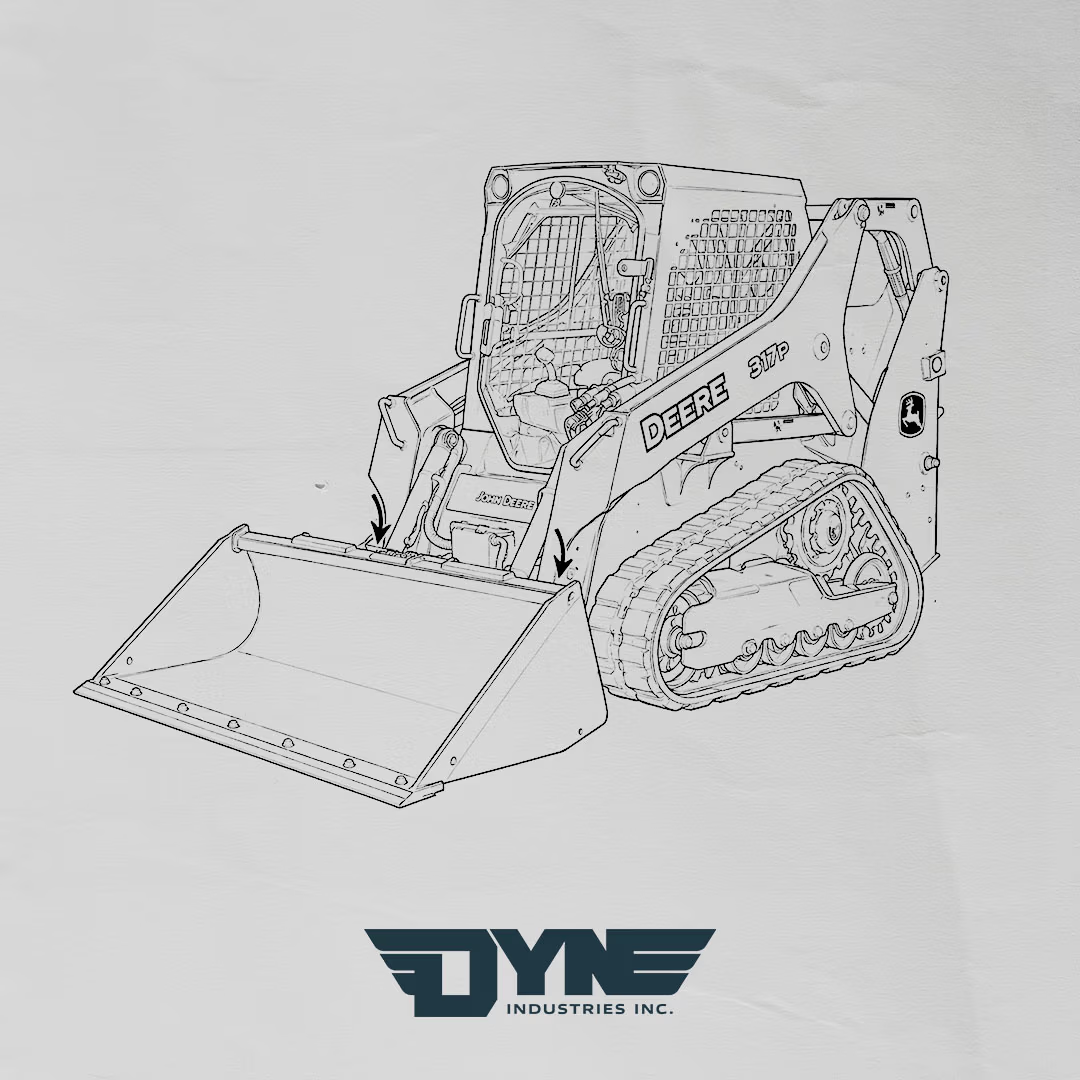
A compact track loader, often called a CTL, is built with a dedicated rubber track undercarriage. These machines include tracked loaders from brands such as Bobcat, Caterpillar, John Deere, Kubota, Takeuchi, and others.
An over-the-tire track system fits around the tires of a wheeled skid steer. These systems may be steel, rubber, or rubber-padded depending on the job.
This article focuses mostly on replacement rubber tracks for compact track loaders because that is where most “when should I replace my skid steer tracks?” questions come from.
Still, the same general warning signs matter for many tracked systems:
- Poor tension
- Damaged components
- Missing pieces
- Poor traction
- Repeated derailment
- Unsafe operation
Before ordering tracks, confirm what type of track system you have. Also verify the machine model, track size, and fitment.
A wrong order can create more downtime than the worn track you were trying to fix.
The Main Signs It Is Time to Replace Skid Steer Tracks

This is the section most operators care about first.
Some warning signs mean “plan replacement soon.” Others mean “stop and inspect the machine now.”
Not every crack or missing rubber chunk means the track is finished. Rubber tracks work in tough conditions, so surface damage is common. The bigger concern is structural damage, poor drive engagement, and tension problems.
Here are the main signs to watch for.
Exposed Steel Cords or Cables
Exposed cords are one of the clearest signs that a rubber track is near the end of safe service.
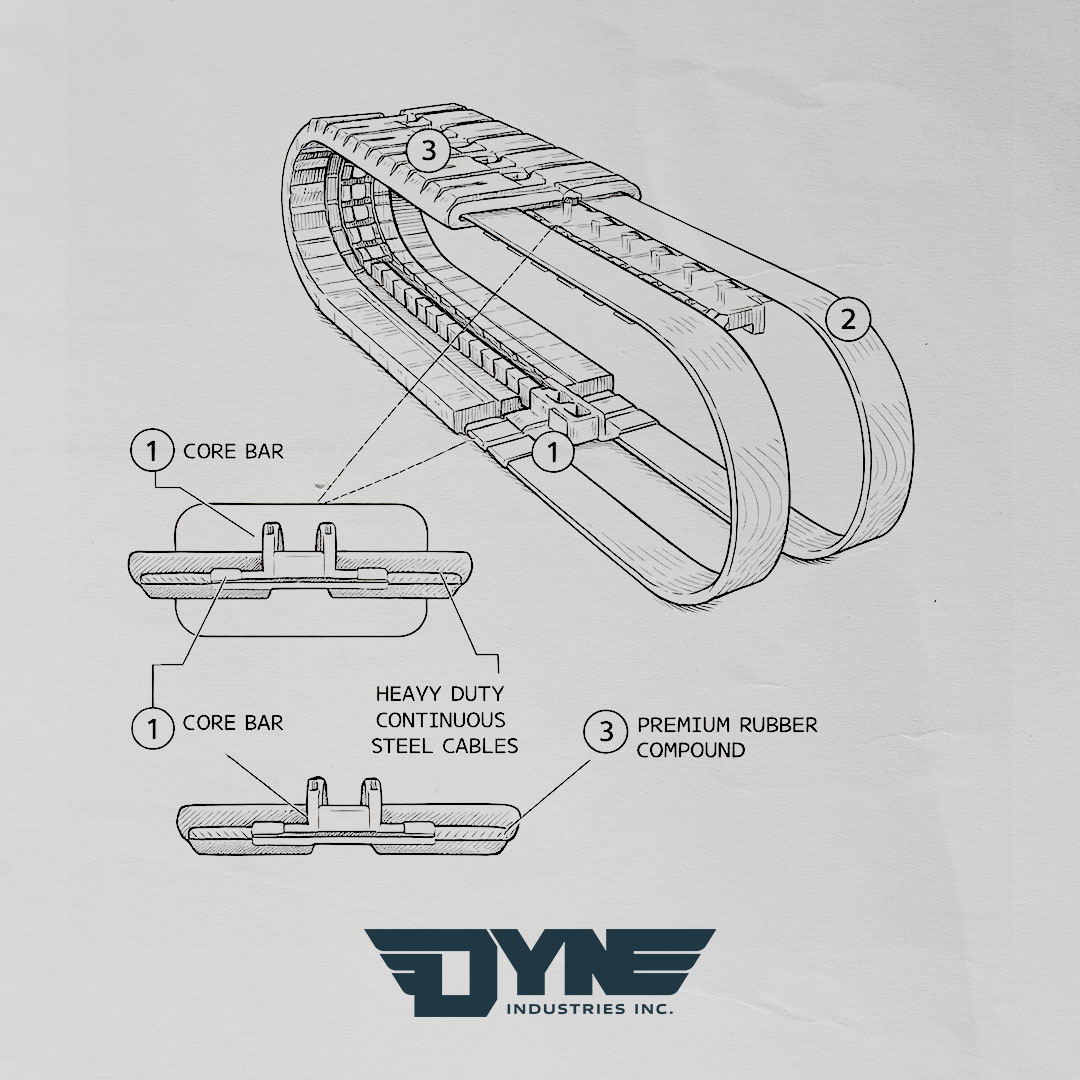
Rubber tracks are built with internal reinforcement. Once that reinforcement is exposed, moisture, dirt, salt, manure, fertilizer, and jobsite debris can attack it.
That can lead to deeper damage and a higher risk of failure.
Small surface cracks may be manageable for a time. Exposed cords are different.
Watch for:
- Steel cords showing through cracks
- Cables visible on the tread side
- Cables visible on the inner track surface
- Rubber peeling away from the reinforced body
- Deep cuts that reach the internal structure
If you can see cords or cables, do not treat it like normal surface wear. Plan replacement or get the track inspected before continuing hard work.
Track Will Not Hold Tension
A track that will not stay in tension is a serious warning sign.
Proper tension keeps the track engaged with the sprocket and aligned on the undercarriage. When a track stretches, tears, or wears internally, it may keep falling out of spec even after adjustment.
This matters because a loose track can derail. A thrown track does not just stop the machine. It can cost hours of labour, damage nearby parts, and hold up the crew.
Watch for:
- The track sags again soon after adjustment
- The machine throws the same track more than once
- The track slips under load
- The track feels loose after normal use
- The operator keeps tightening the same side again and again
If the track cannot hold proper tension after correct adjustment, replacement should be strongly considered.
Before installing a new track, inspect the sprocket, rollers, idlers, and tension system. A new track will not fix a damaged undercarriage.
Ratcheting or Skipping Over the Sprocket
Ratcheting happens when the track drive embeds skip over the sprocket teeth instead of engaging properly.
You may hear it, feel it, or see the machine lurch under load. Some operators describe it as a popping, slipping, or jumping feeling.
This can happen when:
- The track is too loose
- The sprocket is worn
- The track embeds are worn
- The track is stretched
- The machine is working under heavy load
- Debris is packed into the undercarriage
This is where many owners make a costly mistake. They tighten the track again and keep working.
However, if the track or sprocket is already worn, extra tension may only move the problem somewhere else.
If the track ratchets when tension is correct, inspect both the track and sprocket before running the machine hard.
Repeated De-Tracking
If the track keeps coming off, something is wrong.
One de-tracking event can happen, especially in mud, slopes, packed debris, or rough ground. Repeated de-tracking should not be treated as normal.
Common causes include:
- Loose track tension
- Worn sprockets
- Worn idlers
- Damaged rollers
- Track stretch
- Misalignment
- Damaged guide lugs
- Packed mud, clay, snow, or gravel
- Harsh side-slope operation
Repeated de-tracking can quickly become expensive. It can damage the track, waste labour time, and create safety concerns on the jobsite.
If the machine keeps throwing tracks, inspect the full undercarriage before ordering only the rubber track.
Severe Missing Lugs or Chunking
Missing lugs reduce traction. Severe chunking can also expose the track body and internal reinforcement.
Some chunking is common in rocky or abrasive work. A compact track loader running in demolition debris, frozen gravel, sharp rock, stumps, or broken concrete will not keep a perfect track surface forever.
The question is whether the damage is still cosmetic or has become structural.
A few small chips may not mean immediate replacement. However, replacement planning should move up the list when you see:
- Large missing sections of tread
- Multiple missing lugs in a row
- Deep chunking into the track body
- Exposed cords
- Loss of traction in normal working conditions
- Damage spreading quickly
If the machine is slipping more often, struggling on slopes, or losing grip in mud or snow, worn tread may already be costing productivity.
Tread Is Worn Below Practical Limits
Tread wear does not always look as dramatic as a torn track, but it still matters.
Worn tread can reduce traction in mud, snow, slopes, loose soil, and wet ground. More slipping can also create more heat and more wear.
A good inspection should include a tread depth check.
Use a tread depth gauge or caliper if possible. If you manage a fleet, record tread depth with machine hours so you can plan replacement before busy season.
Watch for:
- Low tread height
- Smooth or rounded tread bars
- Poor grip in normal conditions
- More spinning than usual
- Reduced climbing or braking control
- Uneven tread wear from side to side
The key is to measure instead of guess.
If the tread is near the published wear limit for your machine or track, plan replacement before it becomes a failure.
Uneven Wear Between Tracks
If one track is wearing much faster than the other, do not ignore it.
Uneven wear can point to:
- Side-slope work
- Operator habits
- Alignment issues
- A worn roller
- A damaged idler
- Sprocket wear
- Repeated turning in one direction
- Jobsite conditions that load one side harder
For example, a landscaper working along the same slope all week may wear one side faster. A contractor turning in the same direction all day in tight spaces may see uneven wear. A rental machine may show uneven wear because each operator runs it differently.
If one side is much worse, inspect both tracks and both undercarriages.
Replacing one track may be fine in some cases, but you need to understand why it wore faster.
Cracked, Damaged, or Separated Guide Lugs
Guide lugs help keep the track aligned on the undercarriage. If they are badly worn, torn, or missing, the track may be more likely to walk out of alignment or derail.
This is especially important when combined with:
- Loose tension
- Worn rollers
- Side-slope work
- Packed debris
- Worn sprockets
- Poor alignment
Inspect the inner side of the track, not just the outer tread.
Many operators only look at the tread bars touching the ground. But the inside of the track tells you a lot about alignment, roller condition, and drive engagement.
If guide lug damage is severe, plan replacement and inspect the rollers and idlers before installing new tracks.
How to Inspect Skid Steer Tracks Before You Replace Them

A good inspection does not need to be complicated. What matters is that it is safe, consistent, and done before the track fails.
The best time to inspect tracks is before the shift, after cleaning, and during regular service. For high-wear jobs, you may need to check more often during the day.
First, follow basic safety steps.
Park on level ground, lower the attachment, shut the machine down, and follow the machine manual before inspecting or adjusting tracks.
Step 1: Walk Around the Machine
Start with a slow visual check.
Look for:
- Cuts
- Cracks
- Missing lugs
- Exposed cords
- Missing chunks
- Uneven wear
- Abnormal sag
- Debris packed in the undercarriage
- Oil leakage near rollers or travel motors
- Damage to idlers, rollers, and sprockets
A walk-around is not just a formality. Many costly failures show warning signs before they stop the machine.
Step 2: Clean the Undercarriage
Next, clean the undercarriage.
Mud, clay, gravel, snow, and debris can hide problems. They can also change effective track tension.
This is a big deal in Canadian working conditions. Mud that freezes overnight can make the next morning harder on the machine. Packed snow, clay, and gravel can also create tension problems before the operator notices.
Clean out:
- Mud
- Clay
- Gravel
- Snow
- Ice
- Sticks
- Wire
- Demolition debris
- Rocks packed around rollers or sprockets
Clean first. Then inspect.
Step 3: Check Track Tension
Track tension should match the machine manufacturer’s instructions.
Do not guess.
A track that is too loose can derail, ratchet, or wear unevenly. A track that is too tight can stress rollers, idlers, bearings, sprockets, and the track itself.
The correct measurement is not the same for every machine. Always check the operator manual for the right method and spec.
Watch for these tension problems:
- Track sag outside the recommended range
- Track too tight after working in packed material
- Track too loose after adjustment
- Repeated adjustment needed on the same side
- Track skipping over the sprocket
- Track walking off the undercarriage
If tension will not stay correct, look deeper. The problem may be the track, but it may also be the sprocket, idler, roller, or tensioning system.
Step 4: Measure Tread Depth
If the track looks worn but not torn, measure it.
Use a tread depth gauge or caliper. Measure consistently, then compare both tracks.
Do not rely only on eyesight. Worn tread can look “good enough” until the machine starts slipping on slopes, spinning in mud, or losing control in snow.
For fleet managers, tread depth records are useful. They help you predict when tracks should be ordered, especially before a busy season.
Step 5: Inspect Sprockets, Rollers, and Idlers
Do not treat the rubber track as the only wear item.
A worn sprocket can damage a new track. A seized roller can create heat and flat spots. A sharp idler edge can cut into a track that still had life left.
Check for:
- Hooked sprocket teeth
- Broken sprocket teeth
- Sharp sprocket wear
- Rollers that do not turn freely
- Flat-spotted rollers
- Leaking roller seals
- Damaged idlers
- Sharp edges
- Uneven wear patterns
This is one of the most important parts of the inspection.
If you put new rubber tracks on a worn-out undercarriage, the new tracks may wear out faster than they should.
Step 6: Compare Both Sides
Finally, check both tracks, even if only one looks bad.
Compare:
- Tread depth
- Lug damage
- Track sag
- Guide lug wear
- Inner track wear
- Sprocket condition
- Roller condition
- Idler condition
If the right side is much worse than the left, ask why. The cause may be work pattern, slope direction, operator habit, alignment, or undercarriage damage.
A quick comparison can prevent repeat failure after the new track is installed.
Normal Wear vs. Replacement-Level Damage
Not every mark on a rubber track is a reason to replace it.
Rubber tracks work in rough conditions, so surface wear is expected. The goal is to separate cosmetic damage from structural damage.
Cosmetic damage may include:
- Light cracks
- Shallow cuts
- Small chips
- Minor edge wear
- Small missing rubber chunks
These should be monitored, but they do not always mean the track is finished.
Replacement-level damage is different. It affects the track’s ability to work safely and reliably.
Watch for:
- Exposed steel cords or cables
- Track will not hold tension
- Repeated ratcheting over the sprocket
- Repeated de-tracking
- Severe missing lugs
- Major separation in the track body
- Damaged guide lugs
- Tread worn below practical limits
- Inner track damage caused by rollers or idlers
Here is a simple way to think about it.
If the damage is shallow, stable, and not affecting tension, traction, or alignment, monitor it closely.
If the damage exposes reinforcement, affects tension, causes slipping, or leads to de-tracking, it is time to plan replacement or stop and inspect.
Do not panic over every surface mark. But do not keep running a track that is showing structural failure.
Track Tension Problems That Point to Replacement
Track tension is one of the biggest clues that a track is nearing the end of service. It is also one of the easiest things to get wrong.
Too loose is a problem. Too tight is also a problem.
A loose track can:
- Derail
- Ratchet over the sprocket
- Wear unevenly
- Damage guide lugs
- Reduce machine control
A tight track can:
- Increase stress on bearings
- Speed up roller and idler wear
- Increase sprocket wear
- Reduce track life
- Create extra strain on the drive system
Here is what to watch for on the jobsite:
- You adjust the track, but it quickly goes loose again
- The track sags more than the manual allows
- The track walks off the undercarriage
- The track skips under load
- The machine feels rough or unstable
- The track gets tight after working in mud, clay, snow, or debris
- The operator keeps tightening the track to hide another problem
That last point matters.
Over-tightening is not a fix for a worn track, poor alignment, worn sprocket, or damaged roller.
If the track cannot maintain proper tension after correct adjustment, replacement should be strongly considered. Before installing new tracks, inspect the undercarriage so the same problem does not return.
How Sprockets, Rollers, and Idlers Affect Track Replacement

A skid steer track does not work alone. It runs as part of a system.
That system includes:
- Rubber track
- Drive sprocket
- Rollers
- Idlers
- Tensioner
- Track frame
- Hardware
- Undercarriage guards
When one part is worn, it can damage the rest.
For example, a worn sprocket may cause poor engagement, skipping, or faster wear on the track embeds. A seized roller may create heat and uneven wear. A damaged idler may cut the track or guide it poorly.
That is why it is smart to inspect undercarriage components every time you replace tracks.
For daily use, your team does not need to be made up of technicians. However, operators should know the warning signs.
Watch for:
- Hooked or sharp sprocket teeth
- Broken, missing, or badly worn rollers
- Leaking roller seals
- Flat-spotted rollers
- Idler edges that feel sharp
- Track rubbing in an uneven way
- Loud grinding, popping, or clunking
- Metal-to-metal contact where it should not happen
If you replace tracks without checking these parts, you may send a new set into a bad system.
For contractors and fleet managers, this becomes a cost decision. Replacing tracks is not cheap. Protecting those tracks with a proper undercarriage inspection is usually worth the time.
How Jobsite Conditions Change Track Life
Track life is not just about the brand of track. It is also about where and how the machine works.
A track running in soft ground may last much longer than a track running every day over rock, broken concrete, sharp gravel, frozen soil, or asphalt.
A machine doing finish grading on softer ground faces different wear than a machine turning hard all day in a paved yard.
Common jobsite conditions that can shorten track life include:
- Rock and gravel
- Demolition debris
- Concrete rubble
- Rebar, wire, and scrap
- Frozen ruts
- Asphalt and concrete travel
- Sharp curbs
- Side slopes
- Mud that packs into the undercarriage
- Clay that dries hard
- Snow and ice that freeze around components
- Manure, fertilizer, salt, or corrosive material
This does not mean a compact track loader cannot work in tough conditions. It means the inspection schedule needs to match the job.
For example:
- If the machine works in clean soil, daily checks and regular service may be enough.
- If the machine works in clay, mud, snow, or manure, clean the undercarriage more often.
- If the machine works in demolition or rock, inspect for cuts, chunks, and exposed cords more often.
- If the machine works on pavement, watch for faster tread wear.
- If the machine works on slopes, compare both tracks for uneven wear.
That extra inspection time can prevent a track failure far from the shop.
Operator Habits That Speed Up Track Wear
Operator habits can make a major difference in track life.
The same machine, same track, and same jobsite can produce different results depending on how the machine is run.
The most common habits that shorten track life include:
- Sharp counter-rotation
- Spinning the tracks
- Driving too fast on hard surfaces
- Turning under heavy load
- Hitting curbs at speed
- Working across slopes without changing travel direction
- Running too long on pavement
- Ignoring packed debris
- Running with poor track tension
Better habits can help protect the tracks.
When possible:
- Use wider turns
- Use three-point turns in tight spaces
- Avoid spinning when stuck
- Reduce speed on hard or abrasive surfaces
- Avoid long travel on pavement
- Approach curbs slowly
- Keep the undercarriage clean
- Recheck tension after packing material builds up
- Train new operators on basic track care
For rental companies, this is especially important.
A machine may look fine when it leaves the yard, but one poor operator can add a lot of wear in a short rental period.
A simple checkout and return inspection can help catch problems early.
When to Replace One Track vs. Both Tracks
Many owners ask whether they need to replace both skid steer tracks at the same time.
The answer depends on wear, damage, budget, and machine use.
If both tracks have similar hours and similar wear, replacing them as a pair often makes sense. It gives the machine even traction and a more balanced feel.
If one track is damaged early because of a cut, impact, or jobsite accident, replacing only one track may be reasonable. However, you should still compare the new track to the remaining track.
Before deciding, ask:
- Is the remaining track still holding tension?
- Is the tread depth close to the new track?
- Is there exposed reinforcement?
- Does the machine pull or feel uneven?
- Are both tracks the same size?
- Are both tracks the same tread pattern?
- Is the undercarriage in good condition on both sides?
- Is this a critical machine where downtime risk is high?
For many contractors, the decision comes down to risk.
If the second track is near the end of life, replacing only one may save money today but create downtime soon after.
For fleets, it can help to track:
- Machine hours
- Tread depth
- Replacement dates
- Failure causes
- Jobsite conditions
- Operator notes
That data makes the one-track vs. two-track decision easier over time.
What to Check Before Ordering Replacement Rubber Tracks
Before you order replacement rubber tracks, slow down and confirm the details.
A wrong track size or wrong fitment can stop the job just as fast as a failed track.
You will usually need the track size, machine make, model, year if relevant, and sometimes the undercarriage configuration. Some models have different track widths or fitment options.
Check the existing track for size markings. Rubber track sizes are commonly listed with three numbers:
- Width
- Pitch
- Number of links
If the markings are worn off, check the manual or ask for help before ordering.
Before buying, collect:
- Machine make
- Machine model
- Serial number if available
- Current track size
- Track width
- Pitch
- Number of links
- Tread pattern preference
- Photos of the current track
- Photos of sprockets, rollers, and idlers if wear is a concern
- Main jobsite conditions
Also think about tread pattern.
A machine used mainly in mud, clay, snow, or soft ground may need a different tread style than one used around pavement, landscaping, or finished surfaces.
Do not choose only by price.
Choose by:
- Fitment
- Application
- Track quality
- Availability
- Support
- Tread pattern
- Downtime risk
A lower-cost track that does not fit, wears fast in your conditions, or fails during peak season can become expensive quickly.
A Simple Decision Framework for Replacing Skid Steer Tracks
When you are not sure what to do, use a simple field framework.
Start with safety. Then check measurable wear. Then look at the undercarriage and jobsite risk.
Replace Now or Stop and Inspect Immediately
Do not keep running the machine without deeper inspection if you see:
- Exposed steel cords or cables
- Track will not hold tension
- Repeated ratcheting over the sprocket
- Repeated de-tracking
- Major guide lug damage
- Severe missing lugs across the track
- Large separation or tearing in the track body
- Sharp roller or idler damage that can cut the track
- Severe uneven wear that affects stability or alignment
These are not small issues. They can lead to track failure, sprocket damage, undercarriage wear, or downtime on the job.
Plan Replacement Soon
Plan replacement soon if you see:
- Tread is near the published wear limit
- Traction is poor in normal working conditions
- Cracks and chunking are getting worse
- One track is wearing much faster than the other
- The machine needs frequent tension adjustment
- The track is slipping more often under load
- The machine is entering a busy season and the tracks are near end of life
This is the stage where planning helps most.
You may still have time to order tracks, schedule downtime, and avoid failure during a critical job.
Continue Running and Monitor
You may be able to keep running if:
- Damage is minor and cosmetic
- No reinforcement is exposed
- Track tension is stable
- The track does not ratchet or skip
- The machine does not derail
- Tread depth is still usable
- Sprockets, rollers, and idlers are in fair condition
- Wear is being checked regularly
Keep records and inspect more often. Small issues can grow quickly in rocky, muddy, frozen, or abrasive conditions.
Repair the Root Cause Before Installing New Tracks
Before installing new tracks, fix problems that could damage them.
That may include:
- Worn sprockets
- Damaged rollers
- Sharp idlers
- Poor alignment
- Packed debris
- Bad tensioning habits
- Operator habits causing uneven wear
A new rubber track is only as protected as the undercarriage it runs on.
This framework helps you avoid two expensive mistakes: replacing tracks too early or running them too long.
Skid Steer Track Maintenance That Can Delay Replacement
Good maintenance cannot make tracks last forever, but it can help you get better value from them.
The main habits are simple:
- Inspect often
- Clean the undercarriage
- Keep tension correct
- Operate smoothly
- Repair undercarriage problems early
- Replace tracks before failure causes larger damage
Here is a practical maintenance routine.
Daily Checks
Before each shift:
- Walk around the machine
- Look for cuts, cracks, missing lugs, and exposed cords
- Check for abnormal sag
- Clean out packed debris
- Look for oil leaks near rollers and travel motors
- Watch for unusual noise or vibration
- Compare both tracks quickly
Weekly or Scheduled Checks
During regular service:
- Measure tread depth
- Check track tension using the manual
- Inspect sprockets
- Inspect rollers and idlers
- Compare wear on both sides
- Record hours and wear notes
- Check for guide lug damage
Checks After Harsh Conditions
After working in mud, clay, snow, rock, manure, gravel, or demolition debris:
- Clean the undercarriage
- Recheck tension
- Inspect the inner track
- Look for packed material around sprockets and rollers
- Check for new cuts or exposed reinforcement
- Look for sharp debris stuck in the track
Before Busy Season
Before peak work starts:
- Measure both tracks
- Inspect the full undercarriage
- Order parts before failure risk is high
- Decide whether one or both tracks should be replaced
- Keep track size and fitment information on file
- Plan downtime instead of waiting for breakdowns
These habits are not complicated, but they are easy to skip when the job is moving fast.
That is usually when track problems become expensive.
Need Replacement Rubber Tracks for Your Skid Steer or Compact Track Loader?
Replacing skid steer tracks at the right time helps protect your machine, your schedule, and your crew.
Waiting too long can lead to de-tracking, poor traction, sprocket damage, and downtime when the job is already under pressure.
The best approach is simple:
- Inspect tracks daily
- Measure wear when needed
- Keep tension within the machine’s specifications
- Clean the undercarriage
- Watch for exposed cords or cables
- Inspect sprockets, rollers, and idlers
- Replace tracks before wear becomes bigger damage
Need help finding the right replacement rubber tracks?
Dyne Industries supplies high-quality replacement rubber tracks for compact equipment across Canada. Contact Dyne Industries or request a quote, and our team can help you confirm the right fit before you order.
FAQ: When to Replace Skid Steer Tracks
These are common questions from equipment owners, operators, fleet managers, rental companies, farmers, and landscapers who are trying to decide whether to keep running or order replacement rubber tracks.
Replace skid steer tracks when they show structural damage, cannot hold proper tension, repeatedly ratchet over the sprocket, keep de-tracking, expose steel cords, or fall below the wear limits listed by the manufacturer.
Do not rely only on hours. Inspect the track and undercarriage as a system.
Small surface cracks can happen in normal use, especially on machines working in rough or abrasive conditions.
The bigger concern is whether the cracks expose steel cords, cause separation, or affect track tension. If reinforcement is exposed, plan replacement or get the track inspected right away.
If both tracks are worn evenly and near the end of life, replacing them as a pair often makes sense.
If one track failed early from impact damage and the other is still in good condition, replacing one may be reasonable. Always compare tread depth, tension, and undercarriage condition before deciding.
A track that keeps coming loose after proper adjustment should be inspected right away.
It may be stretched, damaged, or running on worn undercarriage components. If it cannot maintain proper tension, replacement is usually the safer path.
Check the track size, machine make and model, tread wear, exposed cords, guide lugs, sprockets, rollers, idlers, and tension system.
Take photos if you need fitment help. Confirm the right replacement rubber tracks before ordering so you avoid delays and wrong-fit issues.