


If you are shopping for a Ditch Witch or trying to keep one running through a busy season, you already know the pressure. A short trench job can turn into a full-day problem fast when the ground gets rocky, the soil is frozen, or the machine starts fighting you.
This guide is built for real work in Canada. We will break down what a Ditch Witch is, which machines fit which jobs, how to compare trenchers and HDD rigs, and what to watch for when you rent.
We will also cover the stuff that actually costs you money, wear parts, chain choice, track tension, and the small mistakes that lead to downtime.
And if you are here because you need rubber tracks for your Ditch Witch, you can take action right away. Shop rubber tracks here (or call us for a fast fitment match) and we will help you confirm the right size before you order.
You can also start building a wishlist so when you are ready, you are not starting from scratch in the middle of a breakdown.
Now let’s get into the machines, the work they are built for, and how to choose the right setup the first time.
TL;DR
- Ditch Witch machines are built for trenching, boring, and utility installs, choose the right class for your typical depth, soil, and access.
- Walk-behind trenchers are often the best fit for residential work, especially when gates are tight and lawn damage matters.
- Chain and tooth choice matters as much as the machine, match your digging setup to soft soil, mixed ground, or rocky conditions.
- Prevent downtime with simple habits, quick pre-start checks, proper tension, and keeping the undercarriage clean.
- If you need rubber tracks for your Ditch Witch, confirm size first (sidewall or width, pitch, links), then build a wishlist or request a fitment match so you order once and get back to work.
Shop Rubber tracks
Get Back on Track, Fast
Search, Quote, Ship, Back to Work
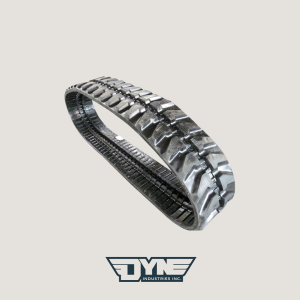
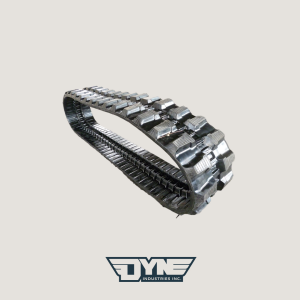

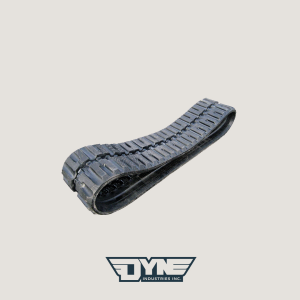
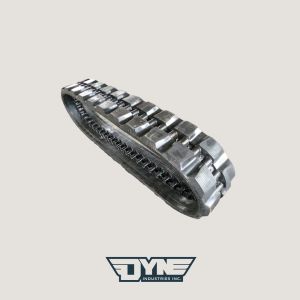
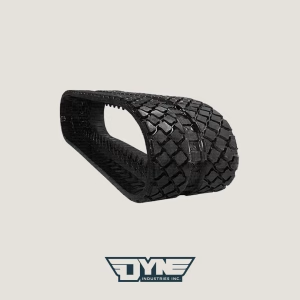
What is a Ditch Witch, and what is it used for?
If you have ever heard a crew say “grab the Ditch Witch,” they might mean the brand, or they might mean “grab a trencher.”
In this section, you will learn what a Ditch Witch is, what these machines actually do, and where they fit best so you do not end up renting the wrong tool for the ground you are in.
Ditch Witch definition (brand name vs “a trencher”)
Ditch Witch is a brand name, not a machine type. The company behind it is Charles Machine Works, and the brand became so common on utility jobs that some people use “Ditch Witch” like a nickname for a trencher, kind of like how people say “Skilsaw” for a circular saw.
A trencher is the machine type. Ditch Witch is one of the best known makers of trenchers, plus a bunch of other underground equipment.
What Ditch Witch machines actually do (trenching, boring, compact loading, cleanup)
Most Ditch Witch equipment is built for one goal, get utilities in the ground faster, with less hand digging.
Here is what that looks like on real jobs:
- Trenching: Cutting a narrow trench for irrigation, electrical, fibre, gas, water, or drainage.
- Boring: Making a hole under a driveway, sidewalk, or road without open cutting.
- Directional drilling (HDD): Drilling a controlled underground path for longer crossings (often for fibre and gas).
- Compact loading and cleanup: Moving spoils, gravel, base, and backfill in tight areas with mini skid steers and tool carriers.
Common jobs people use Ditch Witch for (irrigation, electrical, fiber, gas, drainage)
You see Ditch Witch machines on the jobs where speed matters, access is tight, and the trench needs to stay clean.
Common examples:
- Sprinkler and irrigation lines in finished lawns
- Yard drainage and sump discharge lines
- Electrical service runs to garages, shops, and outbuildings
- Fibre and telecom drops
- Gas service work and short water service lines
On a busy season job, this is the difference between one crew doing a clean install in an afternoon, or two people hand digging until dark.
Quick product map (trenchers, directional drills, mini skid steers, vacs)
Ditch Witch gear usually falls into a few buckets:
- Trenchers (walk-behind and ride-on)
- Horizontal directional drills (often the JT series)
- Mini skid steers and compact tool carriers (the SK line)
- Vacuum excavation and support gear (depending on your market and dealer offerings)
If you can match the bucket to your job, you get to the right machine faster.
When Ditch Witch is the right tool, and when it is not (rock, depth, access limits)
Ditch Witch equipment shines when you need a narrow cut, controlled digging, and good productivity in soil, clay, and mixed ground.
It can be the wrong tool when:
- You are in solid rock and do not have the right chain or tooling (and even then, production can be slow)
- You need a depth or trench profile that is better handled by an excavator
- Access is too tight for the machine, or ground conditions are too steep or too soft for the footprint you have
Here is the practical rule: if the machine is fighting the ground all day, you are not saving time, you are burning up wear parts.
Wrap up for this section:
A Ditch Witch is a brand that covers trenching and trenchless work, plus compact material handling. Now let’s look at the main categories in the lineup so you can pick the right type fast.
Ditch Witch lineup overview (so you can pick the right category fast)
This section gives you a fast map of the main Ditch Witch categories and what to consider before you rent or buy.
The goal is simple: stop guessing, match the machine class to your job, and avoid paying for downtime when the wrong unit shows up.
Trenchers (walk-behind vs ride-on, tracked vs wheeled)

Walk-behind trenchers are the go-to for residential and light commercial work. They fit through gates, they are easier to trailer, and one operator can run them without a big support crew.
Ride-on trenchers step in when you have longer runs, deeper cuts, tougher soil, or you need more production per hour.
Tracked vs wheeled matters too. Tracks usually help when the soil is soft, the lawn is finished, or you are dealing with slopes and wet ground.
Wheels can be fine on firm ground and are often simpler for quick yard work.
Horizontal directional drills (JT series and “all terrain” class)

HDD rigs are for trenchless installs. If you need to cross under pavement, roads, landscaping, or sensitive areas, a drill often beats open cutting.
Ditch Witch HDD rigs are often known by the JT series name. The key is not the badge, it is the size class, the support gear, and whether your crew has the skill and tooling to drill clean bores consistently.
Mini skid steers and compact tool carriers (SK series)

Mini skid steers and compact tool carriers are the support players that save your back and your schedule. They move spoils, backfill, and materials in tight spaces, and they run attachments that can turn one machine into five.
Ditch Witch SK loaders are a common pick in this space, especially for landscape and utility crews that work in yards and tight sites.
Attachments that change the game (boring tools, backfill blades, buckets, grapples)

Attachments are where productivity jumps.
A few that matter on real crews:
- Boring attachment to get under sidewalks and driveways without breaking concrete
- Backfill blade to push spoils back fast, especially on long runs
- Buckets and grapples for cleanup, rock handling, and material moves
If you rent, ask what attachments are available before you book. It is cheaper than sending a second machine later.
Buying checklist (job type, depth, soil, access, transport, support)
Before you pick a unit, run this quick filter:
- What are you installing, and how often do you do this work?
- What does the ground look like (soft loam, clay, gravel, rock)?
- How tight is access (gates, fences, backyards, urban ROW)?
- How will you transport it (trailer size, tie downs, towing capacity)?
- Who supports it locally (dealer techs, parts lead time, training)?
That last one is the quiet deal breaker, especially in peak season.
Wrap up for this section: Once you know the main categories, you can stop shopping blind.
Next, we will zoom in on residential trenching, where most people are comparing walk-behind trenchers and trying to pick the right size without chewing up lawns or timelines.
Best trenching machines for residential landscaping projects
Residential trenching sounds simple until you hit frozen soil, a rocky seam, or a yard you have to leave looking clean.
This section breaks down what “residential” really means, how walk-behind trenchers fit, and how to compare Ditch Witch, Toro, and Vermeer style machines without getting lost in marketing.
What “residential” really means (typical depths, tight gates, soft lawns)
Most residential jobs have three limits:
- Access: You need to fit through gates, between houses, or around landscaping.
- Surface: You need traction without tearing up finished lawns.
- Speed: The homeowner wants it done fast, and you have another job booked tomorrow.
That is why compact, easy-to-run machines win here, even if they are not the biggest or most powerful.
Walk-behind trenchers: the sweet spot for irrigation and yard utilities
Walk-behind trenchers are popular because they are a good balance of size and output. They cut a neat trench, they can be trailered easily, and they do not require a big crew.
They also make it easier to stay controlled. On residential work, control is the difference between a clean trench and a mess you are raking for an hour.
Ditch Witch C and CX series: why contractors like them (maneuverability, traction, common depths)
Ditch Witch walk-behind trenchers in the C and CX family are built for tight sites and repeat work. The brand focuses heavily on trenching, and you can see it in how these units are laid out for service access, operator controls, and jobsite handling.
If you are comparing within Ditch Witch, think about:
- How tight your turning needs to be in backyards
- Whether you need tracks for soft ground
- Whether your dealer support is strong in your area
For Canadian buyers, dealer support matters because parts lead time can make or break your week.
Toro TRX series: where it fits for homeowners and rental fleets (positioning, typical use cases)
Toro TRX trenchers show up a lot in rental fleets and landscape work because they are straightforward and built for repeated use.
Toro also promotes features meant to keep the machine from bogging down in changing soil, which is useful when different operators run the same unit.
If you are a contractor, the big question is not “is it nice,” it is “can my crew run it without abusing it.”
Vermeer RTX series: where it shines (control style, rental friendliness)
Vermeer RTX walk-behind trenchers are often compared here because they are designed for utility style trenching and rental friendliness.
Vermeer also promotes a steering system aimed at making control easier, especially on turf and tight turns.
That control factor can matter when you have a newer operator, or when you are trying to protect a finished yard.
Tracked vs wheeled trenchers (what happens on mud, slopes, and finished lawns)
Tracks usually help when:
- The ground is wet, soft, or uneven
- You are on a side slope and need stability
- You want lower ground pressure to reduce damage on lawns
Wheels can be fine when:
- The ground is firm and flat
- You want a simpler setup for short, clean runs
If you are trenching after rain, tracks often pay for themselves in reduced wheel spin and cleaner control.
Picking the right chain for the soil (cup teeth, combo chains, rock teeth)
The chain is where trenching success starts.
A simple way to think about it:
- Cup tooth style chains are common in softer soils where you want clean spoil flow.
- Combo chains are a middle ground when you might hit some stones.
- Rock or carbide style teeth are for hard ground, rock, or frozen conditions.
Some Ditch Witch manuals get very specific about tooth types and how they wear, and they also call out that rock bits can rotate to extend life.
“Right-size it” decision mini-guide (depth needed, trench width, soil hardness, crew experience)
Here is the jobsite version:
- If you only need a shallow trench and you have tight access, pick a smaller walk-behind and the right chain.
- If you need longer runs, harder soil, or deeper cuts, step up in class so you are not crawling all day.
- If your crew is mixed experience, choose the unit that is more forgiving and easier to control.
A machine that is slightly “too small” for the job often costs more in the end, because you burn teeth, chains, and time.
Quick comparison table (depth range, access width, best for, rental availability)
| Category | Typical trench depth range | Access width | Best for | Rental availability |
| Small walk-behind trencher | Shallow to moderate (check boom options) | Narrow, gate-friendly | Sprinklers, drainage, short utilities | High |
| Mid-size walk-behind trencher | Moderate to deeper (check boom options) | Still yard-friendly | Repeated weekly trenching | High |
| Ride-on trencher | Moderate to deep (varies by model) | Wider footprint | Longer runs, tougher ground | Medium |
Tip: Always confirm trench depth and width on the manufacturer spec sheet before you book or buy.
Wrap up for this section: Residential trenching is about access, control, and picking the right chain for the dirt you actually have.
Next, we will compare Ditch Witch vs Toro vs Vermeer for small trenching jobs, using the factors that matter when you are the one paying for downtime.
Ditch Witch vs Toro vs Vermeer for small trenching jobs
If you are comparing brands, it is easy to get stuck on brochures.
This section keeps it practical: service network, handling in tight yards, how steep the learning curve is for operators, and how to think about rent vs own costs without guessing.
Reliability and service network (the real-world factor buyers forget)
Reliability is not just “does it start.” It is also:
- Can you get teeth, chains, filters, and hydraulic parts quickly?
- Does your dealer have techs who work on these units every week?
- Can you get a loaner or rental replacement if yours is down?
In Canada, Ditch Witch dealer coverage can vary by region, so it is worth checking who supports you locally before you commit.
Maneuverability in tight yards (turning, length, track footprint)
On tight residential sites, turning and footprint matter as much as horsepower.
Look at:
- Overall length (can you turn without backing up three times?)
- Track or wheel footprint (will it chew up turf?)
- Control feel (does it surge, or does it creep smoothly?)
If you are working around patios, gardens, and fences, the easiest machine to place often wins.
Operator learning curve (controls, visibility, how “forgiving” it is)
A forgiving machine saves wear parts.
If your crew runs multiple jobs a day, and more than one person touches the machine, choose the unit that:
- Has controls that feel predictable
- Makes it easy to see the trench line
- Does not tempt the operator to force it
Forcing trenchers is one of the fastest ways to break chains, snap teeth, or cook hydraulic components.
Cost to own vs cost to rent (what to compare beyond sticker price)
Do not just compare monthly payments to daily rental rates.
Also compare:
- Wear parts cost (teeth, chains, sprockets)
- Storage and transport (trailer, tie downs, towing)
- Maintenance time (filters, fluids, cleaning)
- Downtime risk (if it goes down, what is your backup?)
If you trench every week, owning can make sense. If you trench a few times a month, renting may keep your cash free and your maintenance light.
Best pick by scenario
Here is a clean way to think about brand and machine choice.
One-off backyard drainage job
If it is truly one-off, rent from a shop with good support, and pick a machine that fits the yard access.
The “best” machine is the one you can get quickly, with sharp teeth, and a chain that matches your soil.
Landscaping crew doing trenching weekly
If trenching is a weekly service, you want consistency.
That usually means choosing a class of walk-behind trencher that matches your common depth needs, then sticking to one brand so parts and training stay simple.
Utility contractor doing shallow service drops daily
If this is daily work, the service network and parts availability usually matter more than small differences in control feel.
Your goal is to keep a standard setup that your crew can run fast, and that your dealer can support without delay.
Wrap up for this section: Comparing Ditch Witch vs Toro vs Vermeer comes down to support, control, and how often you trench.
Next, we shift into trenchless work and talk about HDD rigs, what to look for, and what questions to ask before you buy.
Top-rated horizontal directional drilling machines for sale (HDD)
HDD is where mistakes get expensive fast.
This section explains HDD in plain language, then walks through what to compare in common rig families so you can shop smarter, whether you are buying new or used.
What HDD is, in plain language (pilot bore, ream, pullback)
Horizontal directional drilling (HDD) is a way to install pipe or conduit without digging an open trench the whole way.
In simple terms:
- Pilot bore: You drill a small guided path underground.
- Ream: You enlarge that path to the size you need.
- Pullback: You pull the product pipe or conduit back through the hole.
HDD is common for crossings under roads, driveways, sidewalks, and sensitive areas where open cutting is a problem.
How to choose an HDD rig (thrust, pullback, torque, rod size, footprint, mud system)
When you compare HDD rigs, the numbers matter, but only because they match the work you do.
Key factors:
- Thrust and pullback: How hard the rig can push and pull.
- Torque: How well it can turn the tooling in tough ground.
- Rod size and length: Impacts what bores you can handle and how stable the drill string is.
- Footprint and access: Can you get the rig into the sites you actually work?
- Mud system: Drilling fluid keeps the hole stable and carries cuttings out, so your mud setup needs to match your bore style.
If you are not sure what you need, look at your last 20 bores and size the rig for that reality, not the biggest job you did once.
Ditch Witch JT series: who it is for and why it sells

Ditch Witch JT drills are common on utility crews because Ditch Witch has a long history in underground construction equipment, and the JT line covers a range of size classes.
The practical reasons rigs like this sell:
- Contractors can match the class to their typical work
- Dealer support and parts availability can be strong in many regions
- Operators get familiar with one control style across the fleet
If you want to go deeper, always pull the spec sheet for the exact model and year you are looking at.
Vermeer Navigator class rigs: what to compare against (power class example specs)
Vermeer Navigator rigs are a common comparison point. The smartest way to compare is to pick the size class you need, then compare apples to apples on thrust, pullback, torque, and the support package.
Do not ignore dealer support. A great rig that is down waiting for parts is not a great rig.
American Augers DD series: when you need big power (large crossings and tough ground)
American Augers DD rigs show up when you move into bigger crossings and tougher ground, where power class, mud systems, and tooling become the whole game.
If you are in this class, “buying a rig” is really buying a system, rig, mud, tooling, transport, and training.
Toro directional drills: where they fit in the market (positioning and support)
Toro directional drills are often evaluated in the same size neighbourhood as other utility rigs, especially when contractors already have support connections in the Toro and Ditch Witch ecosystem.
If your crew is growing, the best fit is the rig that you can support, train on, and keep moving.
New vs used HDD rigs (hours, maintenance history, undercarriage wear, tooling included)
Used HDD rigs can be a good deal, or a hidden bill.
What to check:
- Service history (not just “it runs,” but documented maintenance)
- Rod condition and tooling wear
- Undercarriage condition (tracks, rollers, sprockets)
- Leaks and hydraulic performance under load
- What is included (locator, mud system, reamers, rods)
If the undercarriage is worn out, you can burn through the savings fast.
“Ask this before you buy” checklist (dealer support, parts lead time, training, transport)
Before you sign:
- Who services it locally, and what is parts lead time?
- What training is available for your operators?
- How will you transport it, including mud gear?
- What does the seller include, and what do you still need to purchase?
Wrap up for this section: HDD rigs are a system purchase, not just a machine purchase.
Next, we step back to the basics with walk-behind trenchers, and how to maintain them so you get longevity instead of surprise downtime.
How to maintain a walk-behind trencher for longevity
A walk-behind trencher can be a money maker, or it can be a constant repair project if it is abused.
In this section, you will get a practical maintenance routine you can actually follow, plus the common operator habits that kill machines early.
Pre-job walkaround checklist (fast, repeatable, prevents downtime)
Do this before you start cutting. It takes a few minutes and saves hours.
- Look for leaks under the machine, especially hydraulic lines and fittings
- Check that guards are in place and bolts are not backing out
- Inspect the chain, teeth, and boom for obvious damage
- Confirm controls return properly and safety systems work
- Clear packed mud and debris before it turns into a jam
Ditch Witch itself pushes basic inspection as a habit because it catches small issues before they become breakdowns.
Digging system care (chain, teeth, sprockets) and what “normal wear” looks like
Teeth wear is normal. Broken teeth, missing teeth, and hooked teeth are warning signs.
Watch for:
- Teeth that are rounded off and not cutting clean
- Chain that is stretched and no longer sits right on the sprocket
- Sprockets that are sharp or hooked, which can accelerate chain wear
If trenching suddenly feels slow in the same soil, check the chain and teeth first.
Chain tension basics (what too loose and too tight does to the machine)
Chain tension matters more than most people think.
Too loose can lead to skipping, bouncing, and uneven trenching. Too tight can create extra heat and wear, and it can stress components.
Use the operator manual for your specific machine, and set tension the way the manufacturer says, not the way someone did it once on a different unit.
Track drive upkeep (keeping undercarriage clean, checking rollers and sprockets)
If your walk-behind trencher runs tracks, undercarriage cleaning is not optional.
Packed mud can:
- Push tracks off line
- Wear rollers faster
- Cause extra strain on drive components
At the end of the day, knock off built-up material before it freezes, especially in Canadian winter conditions.
Fluids and filters (simple schedule, dusty jobsite reality)
Dust kills engines and hydraulic systems slowly.
Basic habits that help:
- Check oil and top up as needed
- Keep the air filter clean (dusty trenching plugs filters fast)
- Follow the service schedule for oil changes and hydraulic checks
If your machine is in sandy soil or dry conditions, you may need to service filters more often than the calendar says.
The biggest operator mistake that ruins machines (forcing it past its design limits)
This is the one that shows up on repair bills.
Forcing a trencher in hard ground, ramming the boom, or trying to cut rock with the wrong chain can break teeth, stall the chain, and stress the drive system.
Ditch Witch warns against pushing trenchers past what they are intended to do, and it is advice worth listening to.
Maintenance schedule you can copy (daily, weekly, monthly, seasonal storage)
Daily
- Walkaround inspection
- Clean undercarriage and digging area
- Check fluids
- Inspect chain and teeth
Weekly
- Deep clean, including guards and access panels
- Inspect sprockets and drive components
- Check fasteners and look for vibration wear
Monthly
- Review wear parts, plan replacements before peak season
- Inspect hoses for rubbing and cracking
- Confirm tension and alignment are still correct
Seasonal storage
- Clean thoroughly
- Store out of sun and weather when possible
- Follow the manual for fuel and storage steps
Wrap up for this section: A simple routine keeps a walk-behind trencher productive and reduces surprise downtime.
Next, we get into rubber tracks, how to size them, what quality looks like, and how to order the right replacement for your Ditch Witch equipment.
Rubber tracks for Ditch Witch equipment (how to choose the right replacement)
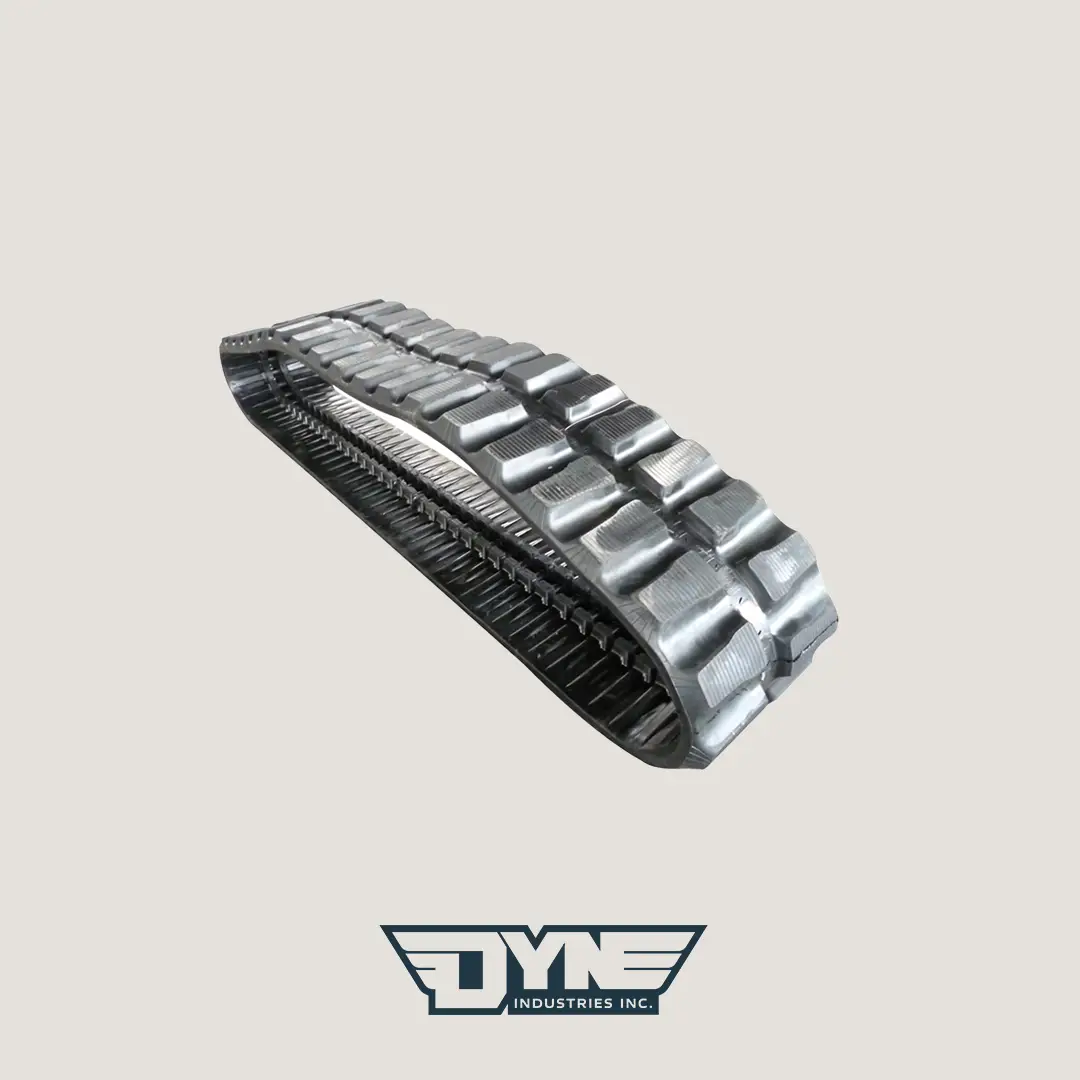
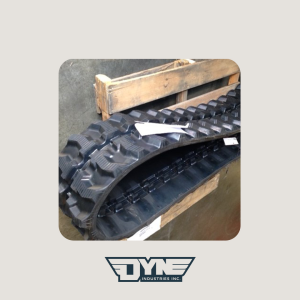
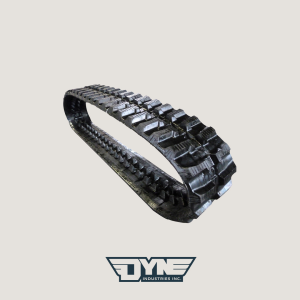
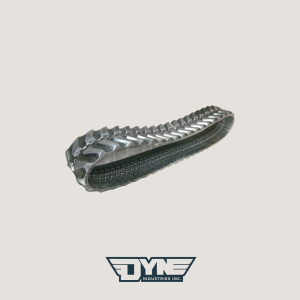
Rubber tracks are where downtime gets real. A wrong size track, worn sprockets, or bad tension can stop a crew mid-job.
This section shows you how to confirm track size, choose the right pattern for your ground, and order with confidence, especially if you are running Ditch Witch equipment in Canadian conditions.
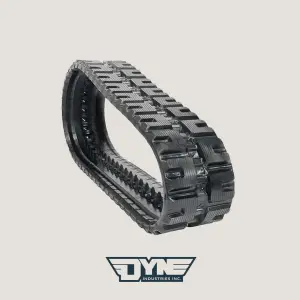
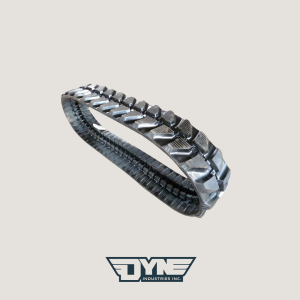
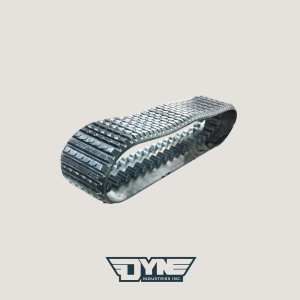
Which Ditch Witch machines run rubber tracks (SK loaders, JT drills, some trenchers)
Many Ditch Witch machines run rubber tracks, especially:
- SK mini skid steers and compact tool carriers
- JT series directional drills
Some trenchers and specialty units also use tracks, depending on model and configuration.
The key is to confirm what your exact machine uses, and then size the replacement correctly.
How to find your exact track size (fastest methods)
There are three fast ways to get the right size. Use at least two of them if you can.
Read the sidewall
Most tracks have the size molded into the rubber. It usually looks like Width x Pitch x Links.
If the sidewall is worn or unreadable, use the next methods.
Use the manual or model lookup
Your machine manual or model documentation often points you to the correct track spec, or at least the part number family.
If you are shopping, always verify by serial and model variation. Small changes can mean different track sizes.
Measure it yourself: width, pitch, links (with a simple example)
This is the standard method in the field:
- Width: measure the track width in millimetres
- Pitch: measure the distance from one lug centre to the next lug centre
- Links: count the number of lugs (or links) around the track
This is a common approach used across rubber track suppliers.
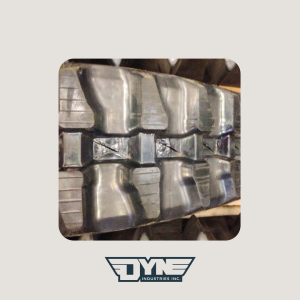
Track pattern basics (what to run on dirt, mud, snow, and mixed ground)
Pattern choice is about traction, cleanup, and how much you are willing to mark up finished surfaces.
A simple guide:
- Dirt and mixed soil: a standard tread is usually fine
- Mud: you want a tread that self-cleans and does not pack up
- Snow and freeze-thaw: traction matters, but so does keeping packed snow from freezing in the undercarriage
- Hard gravel and rock: cut resistance and good operating habits matter as much as pattern
If you are on finished turf, remember that aggressive traction can also mean more surface disturbance.
What “quality” means in rubber tracks (what to look for before you buy)
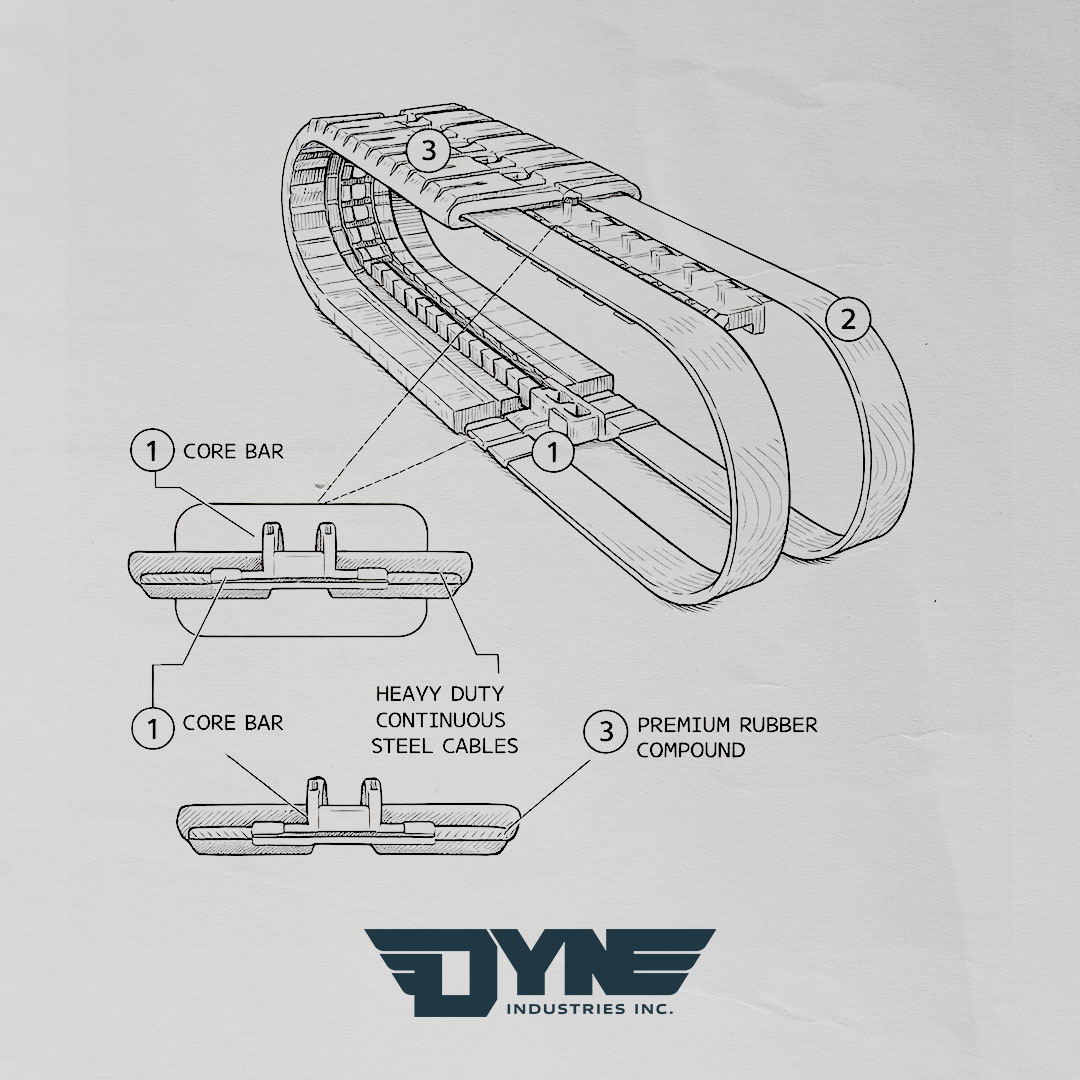
Quality is not just “thicker rubber.” It is how the track is built inside, and how well it matches the drive system on your machine.
Here are three quality checks that matter.
Continuous steel cords and why they matter
Many track designs use internal steel reinforcement to help strength and reduce stretch.
Track construction varies by manufacturer, but reinforcement and build quality are key factors to look into when you compare options.
Rubber compound and cut resistance
Cut resistance matters if you trench in rocky ground, riprap edges, demolition fill, or frozen soil with sharp edges.
A good compound resists chunking and tearing better, but operator habits still matter. Spinning, side loading, and running over sharp spoil piles can cut up even a strong track.
Lug design and proper fit on sprockets
Proper fit is not optional.
If lugs do not mesh right with the sprocket, you can get vibration, faster wear, and a higher chance of de-tracking.
That is why “close enough” sizing is a bad plan. You want the exact width, pitch, and link count.
OEM vs aftermarket tracks (when each makes sense, how to avoid cheap knockoffs)
OEM tracks can be a solid choice when you want a direct match through the dealer and you prefer that channel.
Aftermarket tracks can also be a strong option if you:
- Buy from a reputable supplier
- Confirm exact sizing
- Avoid unknown brands with unclear build quality
The risk is not “aftermarket,” the risk is buying a low-quality track that looks right but is built poorly.
Undercarriage reality check (when sprockets and rollers will eat new tracks)
Here is the hard truth: worn sprockets and rollers can chew up new tracks fast.
Before you install new rubber tracks, inspect:
- Sprocket wear (hooked, sharp, or uneven teeth)
- Rollers and idlers (wobble, leaking seals, flat spots)
- Alignment issues (things not tracking straight)
Important note for Dyne Industries customers: we supply rubber tracks, not undercarriage parts.
If your undercarriage is worn, you may need to source those parts through your dealer or equipment service provider before you put new tracks on.
Track tension and operating habits that extend life (simple do’s and don’ts)
Do
- Keep tracks properly tensioned per the manual
- Clean undercarriage, especially in mud and freeze conditions
- Drive smoothly, especially when turning on hard surfaces
Don’t
- Over-tension (it increases wear)
- Spin tracks when stuck, it builds heat and tears lugs
- Side-load aggressively on slopes or curbs
Small habits can add real hours to track life.
Signs it is time to replace your tracks (performance and safety cues)
Replace is usually on the table when you see:
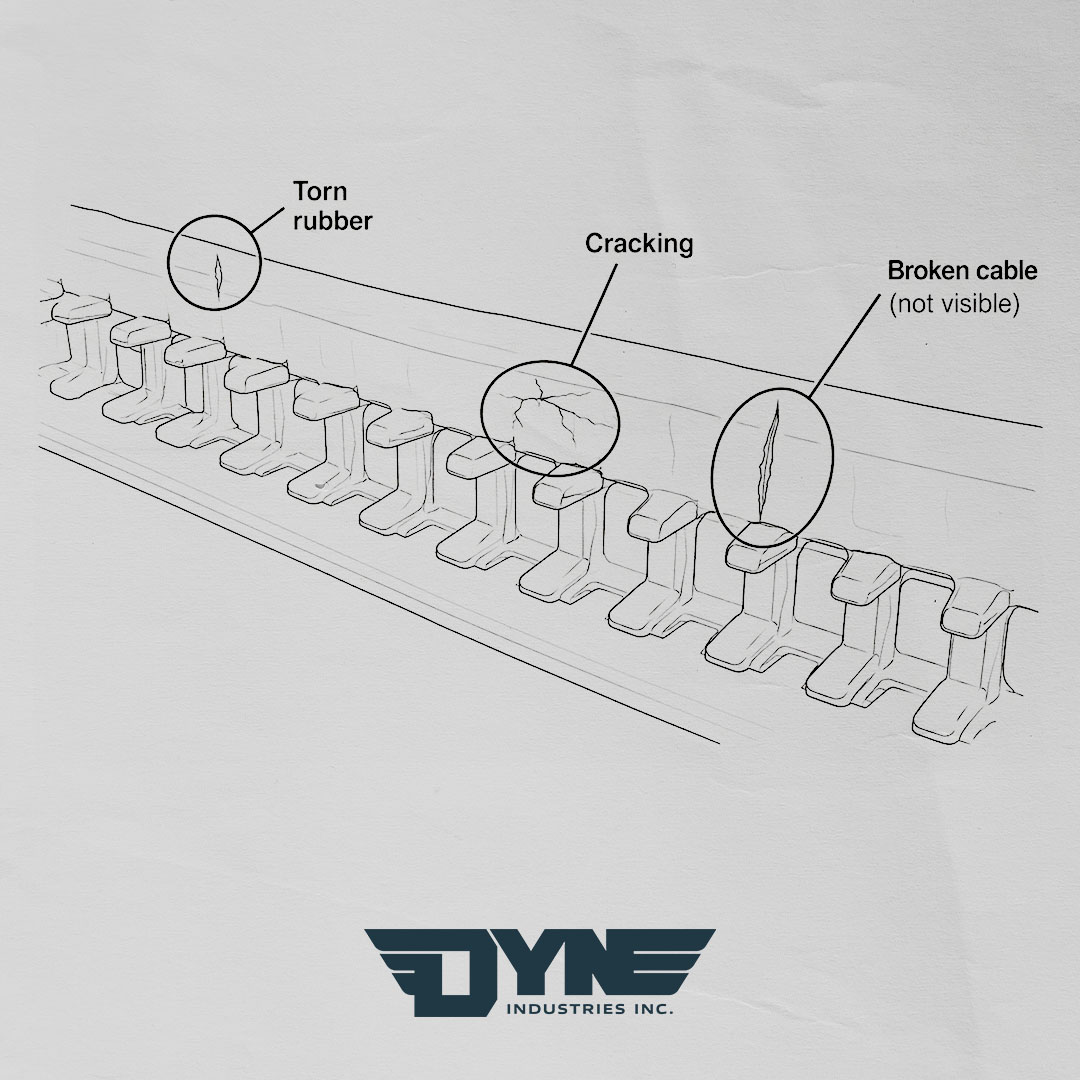
- Cracks and chunking that expose internal structure
- Missing or torn lugs that reduce traction
- Frequent de-tracking
- Uneven wear that you cannot correct with tension and cleaning
If the machine starts walking off line, or you are fighting the track all day, it is not just annoying, it is a safety risk.
Buyer checklist for ordering tracks online (model, serial, measurements, lead time, warranty)
Before you order, confirm:
- Machine model and serial
- Track size (sidewall plus measurement if possible)
- Ground conditions you work in
- Lead time and shipping expectations
- Warranty coverage and return policy
If you are between sizes, do not guess. Get a fitment match first.
Get the right track the first time
If you want to avoid the wrong track showing up when you are already behind schedule, keep it simple.
What info to send for a fast fitment match
Send:
- Machine make and model (example: Ditch Witch SK or JT model)
- Serial number if available
- Track size from sidewall (width x pitch x links)
- A clear photo of the track sidewall, if readable
- Your location and timeline
That lets a supplier confirm fitment without guessing.
Shipping expectations in Canada
Shipping depends on where you are and what stock is available. In Canada, plan ahead during peak season, especially if you are in a remote area or you need a less common size.
What to do if you are unsure between two sizes
Do not order yet.
Measure the track (width, pitch, links) and confirm the machine model variation. A quick check now is cheaper than a return, and it saves you from a dead machine on a tight timeline.
Wrap up for this section: Rubber tracks are a critical wear item on Ditch Witch machines, and the right size and tension habits make a big difference.
Next, we will cover rentals in Canada, what to ask before you book, and where to find underground utility equipment near you.
Where to rent underground utility equipment near me in Canada
Rentals are often the fastest way to get a Ditch Witch or similar machine on site, especially when you have a short job window.
This section covers when rent makes more sense than buy, what to ask the rental shop so you do not inherit problems, and a province-by-province directory to speed up your search.
Rent vs buy decision (frequency, transport, storage, maintenance responsibility)
Renting usually makes sense when:
- You do trenching or boring occasionally
- You do not want storage and maintenance responsibility
- You need a specific machine for a short job
Buying often makes sense when:
- The machine is a weekly tool in your services
- You have a trained operator and a plan for maintenance
- You can keep it working enough hours to justify ownership
The hidden cost is downtime. If your own machine is down and you do not have a backup, you may end up renting anyway.
What to ask a rental shop before you book (hours, teeth condition, chain type, track wear, delivery)
Ask these questions, and ask them before the machine is loaded.
- How many hours are on it, and when was it last serviced?
- What chain is on it right now, and is it right for my soil?
- Are teeth sharp, or are they due for replacement?
- What is the condition of the tracks and undercarriage?
- Can you deliver, and what is the policy if it breaks on site?
You are not being picky. You are protecting your schedule.
The “top providers by province” directory (format as a table for skimmability)
Below are well-known rental options by province. Inventory varies by branch, so always call ahead and confirm the machine type you need (walk-behind trencher, ride-on, mini skid steer, HDD support gear).
British Columbia (5 providers)
| Provider | Notes |
| United Rentals | Multiple BC locations, broad construction fleet |
| Sunbelt Rentals | BC branches including Vancouver and Coquitlam |
| Finning Cat Rental Store | Strong BC network under Finning |
| Herc Rentals | BC locations and large fleet |
| Cooper Equipment Rentals | BC branches, growing network |
Best rentals near me (BC): Most availability is around Metro Vancouver, the Fraser Valley, and Vancouver Island hubs.
Alberta (5 providers)
| Provider | Notes |
| United Rentals | Broad Alberta coverage |
| Sunbelt Rentals | Alberta locations and general tool and equipment |
| Finning Cat Rental Store | Strong Alberta network |
| Herc Rentals | Alberta branches and fleet |
| Cooper Equipment Rentals | Alberta branches |
Best rentals near me (AB): Calgary, Edmonton, and corridor towns often have the best selection.
Saskatchewan (5 providers)
| Provider | Notes |
| United Rentals | Saskatoon and Regina area coverage |
| Sunbelt Rentals | Saskatoon branch |
| Finning Cat Rental Store | Saskatchewan coverage |
| Herc Rentals | Regina location and fleet |
| Westcon Equipment & Rentals | Saskatchewan offices and rental offerings |
Best rentals near me (SK): Saskatoon and Regina are your main hubs, with options along the major highways.
Manitoba (5 providers)
| Provider | Notes |
| United Rentals | Manitoba coverage |
| Sunbelt Rentals | Winnipeg branch |
| Battlefield Equipment Rentals | Manitoba is part of their network |
| Westcon Equipment & Rentals | Winnipeg rental offerings |
| The Rental House (Winnipeg) | Local tool and equipment rental option |
Best rentals near me (MB): Winnipeg is the main hub, with some coverage into Brandon and nearby communities.
Ontario (5 providers)
| Provider | Notes |
| United Rentals | Large Ontario footprint |
| Sunbelt Rentals | Ontario locations across the province |
| Cooper Equipment Rentals | Major Ontario presence |
| Battlefield Equipment Rentals | Ontario is a core region |
| Stephenson’s Rental Services | Ontario-based rental network |
Best rentals near me (ON): GTA, Ottawa, London, and Kitchener-Waterloo usually have the most inventory.
Quebec (5 providers)
| Provider | Notes |
| LOU-TEC | Quebec-wide rental brand |
| Simplex | Quebec rental network |
| United Rentals | Quebec locations |
| Sunbelt Rentals | Quebec branches in the province |
| Battlefield Equipment Rentals | Quebec network coverage |
Best rentals near me (QC): Montreal area and Quebec City usually have the broadest selection.
New Brunswick (5 providers)
| Provider | Notes |
| Battlefield Equipment Rentals | NB branches such as Moncton and Fredericton |
| United Rentals | Fredericton branch and others |
| Sunbelt Rentals | Moncton location |
| Cooper Equipment Rentals | Moncton and Saint John branches |
| A to Z Rental Centre | Local NB rental option |
Best rentals near me (NB): Moncton, Saint John, and Fredericton are the best starting points.
Nova Scotia (5 providers)
| Provider | Notes |
| Battlefield Equipment Rentals | NS network coverage |
| United Rentals | NS locations listed under Halifax search |
| Sunbelt Rentals | Halifax branch and Atlantic presence |
| Cooper Equipment Rentals | Dartmouth branch |
| Bay Equipment Rentals | Local NS company with multiple locations |
Best rentals near me (NS): Halifax-Dartmouth is the main hub, with options in Truro and other regional centres.
Prince Edward Island (5 providers)
| Provider | Notes |
| Battlefield Equipment Rentals | Charlottetown location |
| United Rentals | Charlottetown branch |
| The Home Depot Tool Rental | Charlottetown store has tool rental |
| Advance Rentals | PEI-based rental option |
| JT Rentals | PEI rental company |
Best rentals near me (PEI): Charlottetown is your best bet, then check surrounding towns for local yards.
Newfoundland and Labrador (5 providers)
| Provider | Notes |
| Battlefield Equipment Rentals | NL is part of their network |
| United Rentals | St. John’s area and others |
| The Home Depot Tool Rental | Tool rental listings include St. John’s, NL |
| S&S Supply (Crosstown Rentals) | Local NL rental provider |
| BDP Rentals | Local NL rental provider |
Best rentals near me (NL): St. John’s is the main hub, with more options depending on the region and project type.
What to rent with the machine (trencher chain options, plates, locators, spoils handling)
If you are renting a trencher, ask about:
- Chain options that match your soil
- Plates for driveway crossings and surface protection
- A locator or proof of utility locate process
- Spoils handling (mini skid steer, dump trailer, or a plan to move piles)
A trencher without the right chain can turn a one-day job into a two-day grind.
Pro tips to avoid rental damage charges (cleaning, transport, track tension checks)
Most rental damage charges come from a few avoidable issues:
- Returning the machine packed with mud, especially in the undercarriage
- Transport damage from bad tie downs
- Running tracks too tight or too loose, then de-tracking
- Using the wrong chain for the soil and breaking teeth
Before you load it back up, take photos, clean it, and do a quick inspection.
Wrap up for this section:
Renting a Ditch Witch style machine can be the fastest path to getting work done, as long as you ask the right questions and match the chain and setup to your soil.
Next, we will cover the common mistakes that cost people money with Ditch Witch equipment and rubber tracks, and how to avoid them.
Common mistakes people make with Ditch Witch equipment and rubber tracks
Most breakdowns are not bad luck. They are small choices that stack up, wrong chain, wrong track size, skipped safety steps, and rushed operation in bad ground.
This section calls out the common mistakes and the simple habits that keep your Ditch Witch equipment working instead of sitting.
Buying the wrong track size (and how to prevent it)
Wrong track size leads to poor fit, de-tracking, and wasted time.
Prevent it by:
- Reading the sidewall size
- Measuring width, pitch, and links
- Confirming model and serial variation
If you are between sizes, stop and confirm, do not guess.
Running worn sprockets with new tracks
Worn sprockets can eat a new track faster than most people expect.
If the sprocket teeth are sharp, hooked, or uneven, address that before you install new rubber tracks.
Over-tensioning tracks and chains (premature wear)
Over-tension is a common “feels safe” mistake.
In reality, it adds wear, builds heat, and can increase the chance of problems. Follow the manual and set tension correctly for your machine.
Using the wrong chain for soil (slow digging, broken teeth)
A soft-soil chain in rock can break teeth and stall work.
A rock chain in soft soil can trench slower than it should and create messy spoil flow.
Match chain and teeth to the ground, then trench with steady feed instead of forcing it.
Choosing a machine that is too small (or too big) for the job
Too small means slow work, burned wear parts, and frustrated operators.
Too big means access problems, higher rental cost, and more surface damage.
Right sizing is about the work you do most often, not the biggest job you might do once.
Skipping utility locates and safety steps (costly, dangerous)
This one is not optional.
Before you dig, request utility locates through the proper service for your province and follow damage-prevention best practices.
Wrap up for this section: Most Ditch Witch problems come from preventable mistakes, especially track sizing, tension, chain selection, and skipped safety steps.
Next, we will make machine selection even easier with a quick guide that tells you when to choose a trencher, an HDD rig, or a mini skid steer.
Quick “choose your machine” guide (trencher vs HDD vs mini skid steer)
When you are under pressure, you do not want to overthink equipment choice.
This section gives you a fast, job-based way to choose the right Ditch Witch style machine, plus a simple decision tree you can save for later.
If you need a straight trench, choose this
Choose a trencher when you can open cut, you have a clear route, and you want a clean, narrow trench for utilities.
This is the typical pick for irrigation, drainage, and shallow service runs.
If you need to cross under pavement, choose this
Choose HDD when you need to go under pavement, driveways, roads, or landscaping without cutting the surface.
It costs more than open trenching, but it often saves restoration costs and project risk.
If you need to move spoils and backfill fast, choose this
Choose a mini skid steer or compact tool carrier as the support machine that keeps the trenching crew moving.
It speeds up spoil handling, backfill, and cleanup, especially in tight yards.
If access is tight (gates, fences, small yards), choose this
Choose compact, yard-friendly machines:
- Walk-behind trenchers
- Mini skid steers with the right attachment
- Compact HDD rigs when trenchless is required
Access is a real limit. If you cannot get in, the spec sheet does not matter.
One-page decision tree
Start here:
- Do you need an open trench?
- Yes -> Trencher
- No -> go next
- Yes -> Trencher
- Do you need to cross under pavement or protected surfaces?
- Yes -> HDD
- No -> go next
- Yes -> HDD
- Is your main problem moving spoils, backfill, or materials?
- Yes -> Mini skid steer / tool carrier
- No -> go next
- Yes -> Mini skid steer / tool carrier
- Is the ground too hard for your current plan?
- Yes -> change chain/tooling, step up machine class, or switch methods
- No -> proceed
Wrap up for this section: The right machine choice keeps the job moving and keeps wear parts under control.
Next, we will pull everything together with clear next steps for renting, buying, and replacing tracks, with a final Dyne Industries CTA for track fitment help.
Next steps: pick the right Ditch Witch setup and keep it running
This final section is your action plan. Whether you are renting for a one-off job, buying for weekly trenching, or replacing rubber tracks to get your machine back online, these steps help you move forward with confidence and fewer surprises.
If you are renting: what to check before you leave the yard
Before you tow out:
- Confirm chain type and tooth condition for your soil
- Check track condition and basic tension
- Ask about delivery support if it breaks down
- Make sure you have the attachments you need (backfill blade, boring tool, bucket)
- Take a few photos for return condition
This five-minute check can save you from losing half a day later.
If you are buying: what to compare and what to ask the dealer
When you buy, you are buying support as much as iron.
Ask:
- What parts are common wear items, and what is lead time?
- What training is available for operators?
- What is the service turnaround in peak season?
- What does the warranty cover, and what does it not?
For Ditch Witch in Canada, confirm who your dealer support is in your region.
If you are replacing tracks: how to confirm size and order with confidence
Track ordering should be boring.
Use this process:
- Read the sidewall size
- Measure width, pitch, and links if needed
- Confirm machine model and serial variation
- Inspect undercarriage condition before installing new tracks
If you do this, you avoid the “wrong track on site” nightmare.
Request your rubber track quote
If you want help confirming the right rubber track for your Ditch Witch equipment, we can help you match fitment before you order.
A smart Ditch Witch setup is not just the machine, it is the chain, the tracks, the support, and the habits that prevent downtime.
Next, we will answer the most common Ditch Witch questions people ask, with short, practical answers you can use on real jobs.
FAQ: Ditch Witch
These FAQs cover the quick questions people search when they are trying to choose, rent, or run Ditch Witch equipment. Each answer is kept practical, so you can make a decision and get back to work.
A Ditch Witch typically refers to equipment used to dig narrow trenches or do trenchless bores for utilities. In many cases, people mean a trencher, but Ditch Witch also makes HDD rigs and compact tool carriers.
Ditch Witch equipment is used for installing irrigation, electrical, fibre, gas, water, and drainage lines. It is common in landscaping, utility work, and light construction.
Depth depends on the specific Ditch Witch model and setup. Always check the exact spec sheet for the machine you are using, because different booms and chains change working depth.
Walk-behind trencher depth varies by model and boom option. Many are built for residential and light utility depths, but the only safe answer is to confirm on the manufacturer specs for the exact unit you plan to run.
The name dates back to the early days of the company and the first compact trenchers, when crews saw the machine as a “magic” way to cut a ditch quickly compared to hand digging. Ditch Witch is a long-standing brand name from Charles Machine Works.
The machine type is usually a trencher. Some people also say “walk-behind trencher” or “chain trencher,” depending on the style.
Cost depends on size class, attachments, and whether you buy new or used. A better way to compare is cost to own (payments, wear parts, transport, downtime risk) versus cost to rent for the number of days you actually need it.
Yes, many trenchers can cut through small to medium roots, but it depends on root size, soil, and chain type. If you are hitting large roots repeatedly, trenching can get slow and hard on teeth.
In hard rock, trenchers can struggle, and production depends heavily on chain type, tooth style, and how fractured the rock is. In solid rock, you may need different methods or heavier equipment.
A trencher is not the right tool for cutting concrete slabs. If you need to cross concrete, crews usually saw cut, core drill, or use trenchless methods like boring or HDD, depending on the job and permits.
Neither is “best” for everyone. For small crews, look at control feel, ease of service, parts availability, and your local support network. The right pick is the one your crew can run cleanly and keep running in peak season.
The best walk-behind trencher is the one that fits your access, matches your typical depth needs, and has the right chain for your soil. If you rent, prioritize a unit with sharp teeth and a chain set up for soft soil.
Trench size depends on the line, local code, and frost conditions in your area. If you are unsure, check local requirements and talk to the utility owner or inspector before you dig.
Match chain and teeth to ground conditions. Soft soil often uses cup-style teeth, mixed ground may need a combo chain, and hard ground may need rock-style teeth. Always confirm what your machine supports in the manual.
Daily inspection, cleaning, checking fluids, inspecting teeth and chain wear, and keeping the undercarriage clear are the big ones. Most downtime starts with skipped basics.
Measure track width in millimetres, measure pitch from lug centre to lug centre, and count the number of links around the track. This is a standard industry method for confirming track size.
They can be, if they are built well and sized correctly. The risk is cheap tracks with poor construction or incorrect sizing, which can lead to early wear and de-tracking.
Track life depends on ground conditions, operating habits, and undercarriage condition. Spinning, sharp rock, and running on hard surfaces can shorten life quickly, while proper tension and cleaning can extend it.
Common causes are wrong tension, packed mud or debris, worn undercarriage components, and aggressive turning on hard surfaces. Prevent it with correct tension, cleaning, and undercarriage inspection.
Start with major rental providers in your province, then call branches near your closest city and confirm inventory. The rental directory above gives you a solid starting point.
In slang, “ditch” often means to leave, abandon, or skip something, like “ditch the plan.” In jobsite terms, a ditch is also simply a trench or drainage cut, depending on the context.
Keep Learning